Yesterday my Mother’s day Presents arrived, but it was late and so this morning with a cup of coffee I settled in to look at them
A new pair of tweezers, Pinkett Tweezer. I found out about them in a round about way; Toni Gerdes told another friend about them. And since I love needlework tools I ordered a pair too from A Stitching Shop (www.StitchingShop.com)…they had them in stock.
Pinzette Tweeter
And since I was on their website I checked out the books too. Christine has the best variety of books I have seen. And of course I found a book I have been wanting to see.
Inspirations Book
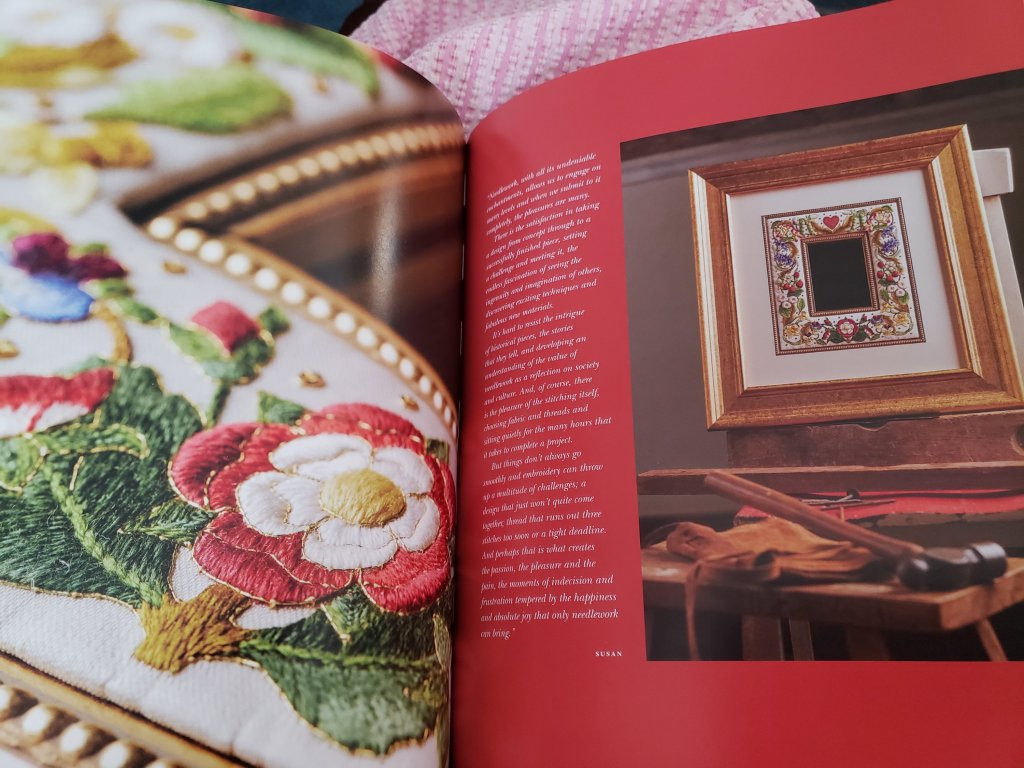
This 200 page book is lovely; there are 12 projects to stitch complete with patterns and instruction. The first 81 pages are the history of Blackstone Creamery, where these projects were photographed. There are also descriptions and artist statements for each of the 12 projects.
Description of projects
The rest of the 200 pages are complete instructions for each of the 12 projects.
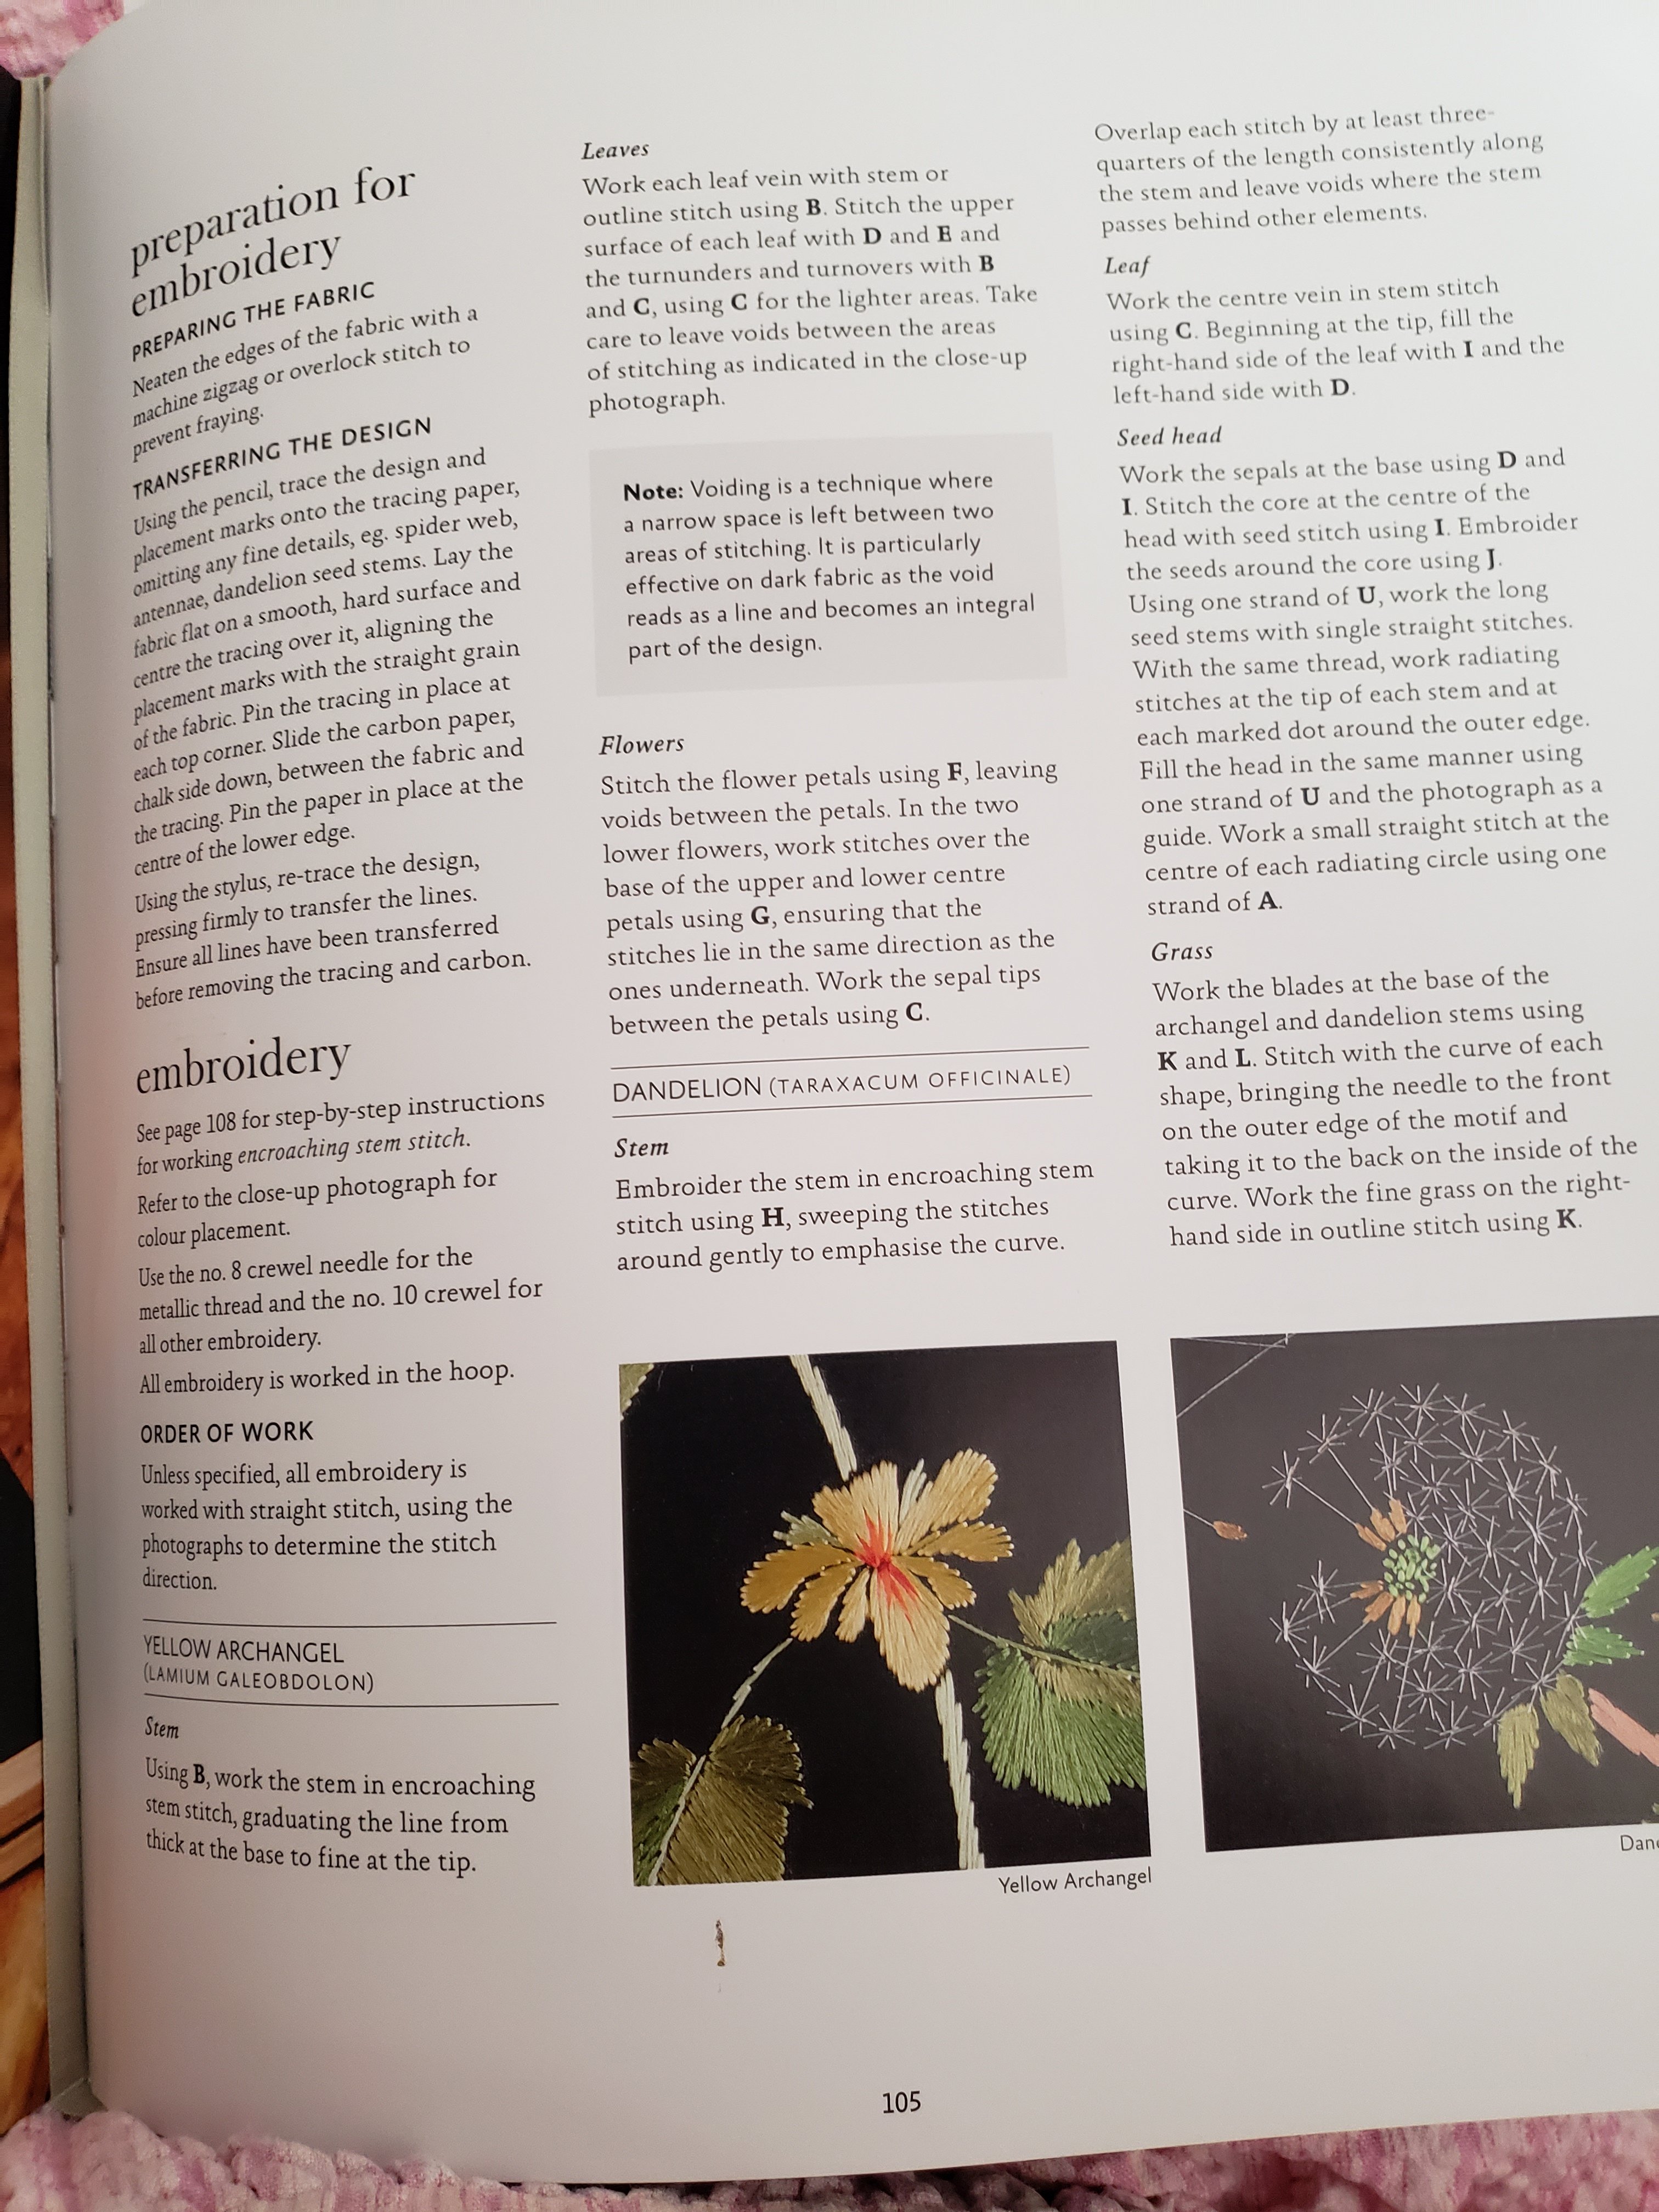
Each project starts with a picture, requirements and preparations for the prject
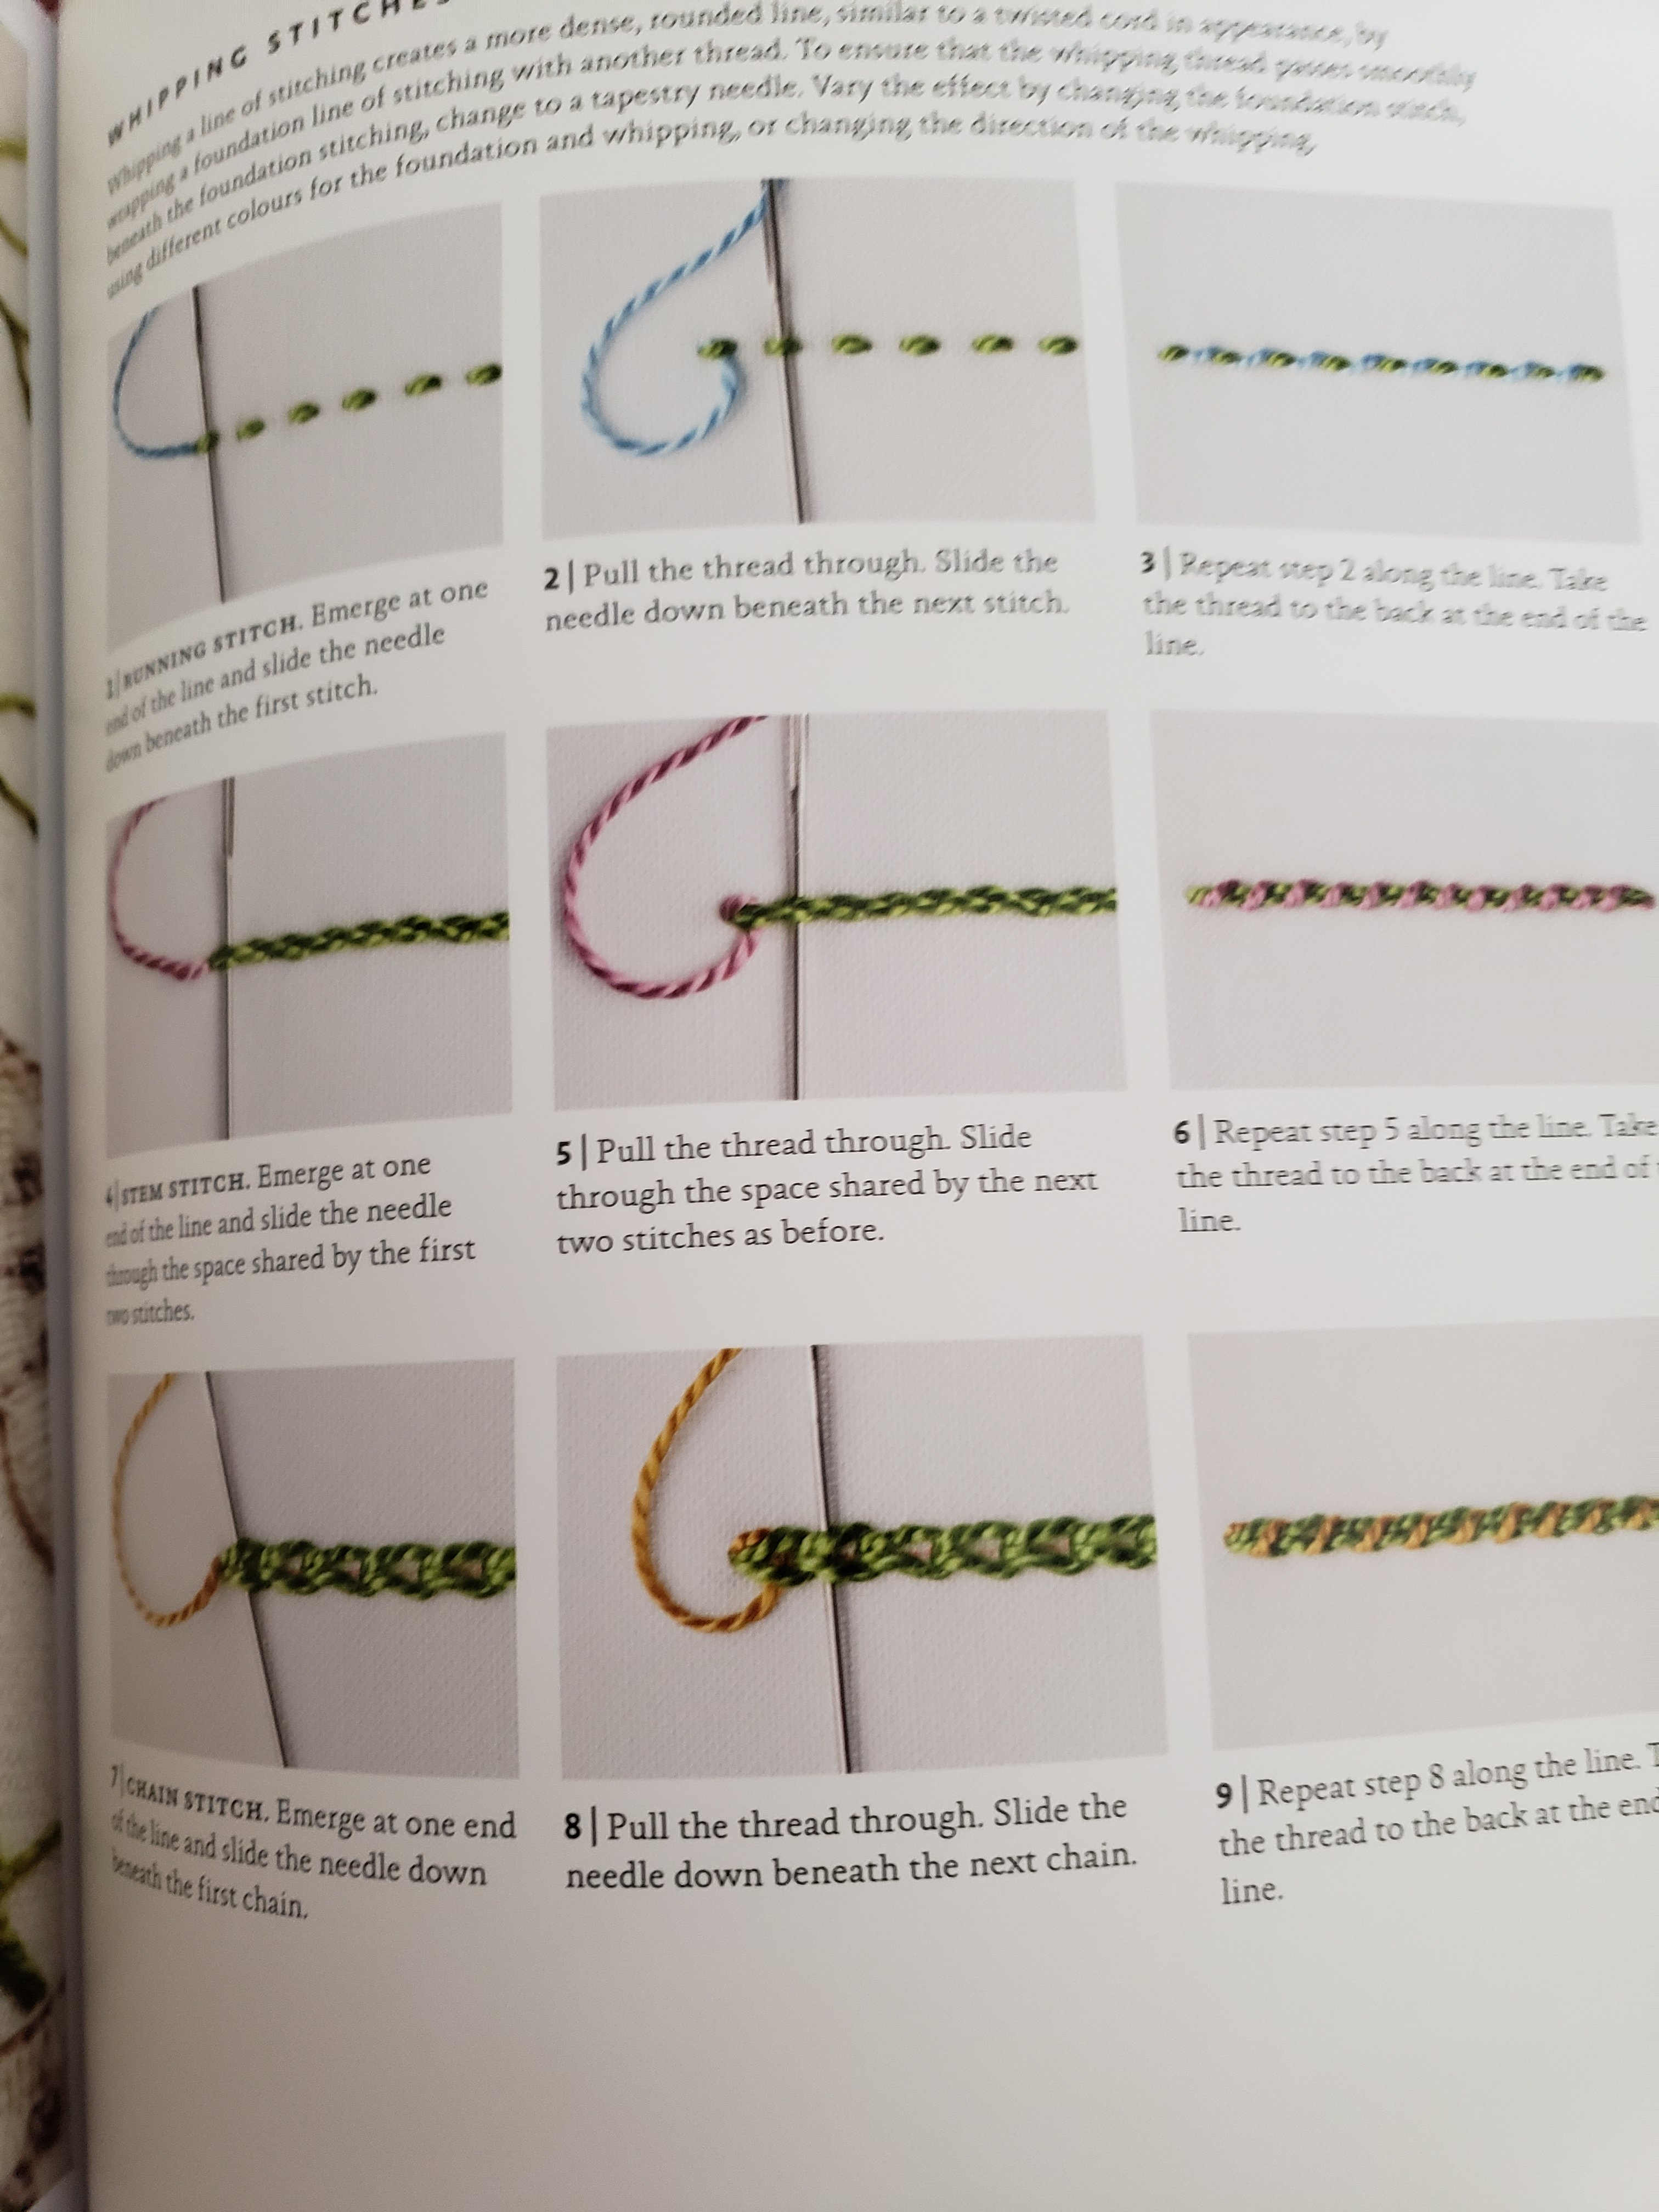
Then there are complete instructions for the project; including stitch diagrams, any aids to help in completing project, and finishing instructions.
And included on inside back cover is a pattern book.
Patterns
I am over the moon about this book; it is a beautiful book! I wanted it because someday I am going to feel qualified to attempt Georgina Bellamy’s (thatembroiderygirl.com) Jewel of the Sea. I saw somewhere(hope I can find it again) where she made this as a needlecase. That would be perfect for me…since I love needlework tools.
Jewel of the Sea
But after looking at this book , there are several projects I would like to try…hope I live long enough. If you would like to see a glimpse of this book and the other two available go to Inspirations web site (Inspirationsstudios.com) and look at them. Then go ask A Stitching Shop (www.StitchingShop.com) if she has it…you’ll save postage from Australia.
I need to get back to my pumpkin. He’s coming along, I am half finished stitching and am really liking it. I will take time a blog about this soon.
I hope you find time to do whatever makes you happiest and creative. And I hope you have time to do it today and every day! ttfn…sue
I gave myself a new needlework tool for Valentine’s Day…It is a laying tool on a beaded lanyard attached to a magnet. I love it! It’s from Merry Needlework Accessories and you can find her on Facebook and Instagram. She sells through shops, but you can contact her to find out who has her stuff.
I’ve started two new big projects. I know, why not one at a time? Well, it’s just not in my D&A to do things logically.
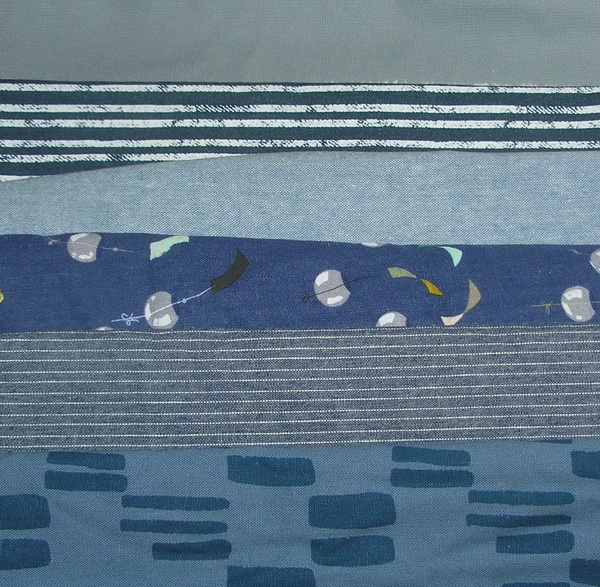
My first project is a jeans jacket, made from old jeans and sewn on a sweat shirt. I bought a sweat shirt 1 size larger than I normally wear, washed and dried it,
So one of my sons had given me seven pairs of his jeans and I decided to try his method…It is pretty slick. As I was taking the jeans apart I decided that I would use the waistbands as the binding for my jacket. I tried to keep the button at the waist but that proved to be more trouble than it is worth. Side Note: you should have seen the look on the Lowes guys face while I was trying to tell him what I was looking to purchase and why…even had the jeans with me to show him. Anyway gave up that idea and am just taking jeans apart.
I wish we had a G-Street Fabric store (https://gstreetfabrics.com/) here like they have in Washington DC; it’s fabulous. But we don’t, so I’sve been to a couple fabric stores here. My favorite is Sarah’s Fabrics (https://sarahsfabrics.com/) in Lawrence Kansas. I’ve bought several fabrics to add to my jeans collection.. More about this project later.
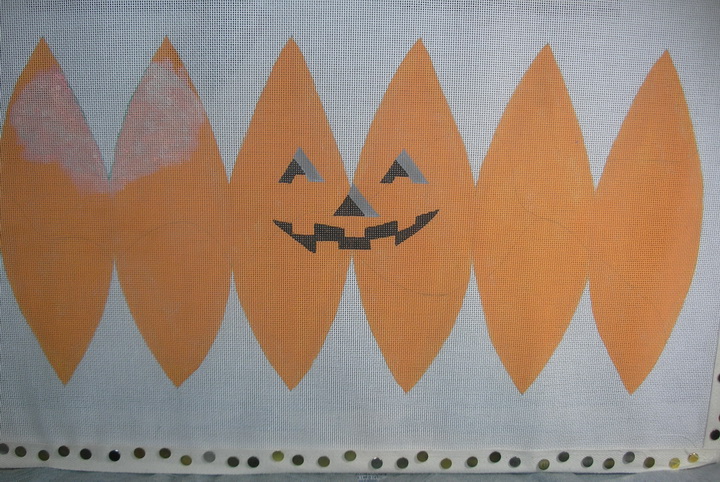
Years ago, several of us bought a 3D pumpkin from Sundance Designs and it had a stitch guide by Ruth Chow. We were all going to get together and stitch it but life got in the way and we never got to it. I think so far only one or two are
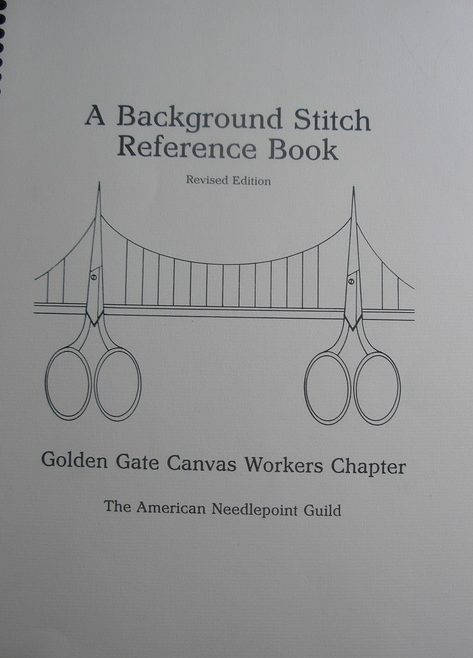
completed. Anyway I decided that this would be a good stitching nest project, so I got it out of my stash and of course could not find the stitch guide. I don’t know what happened to it. Then I spent two days going through my threads and pulled every orange-ish thread I have. Decided that I would use the Background Stitch Reference Book from Golden Gate
Canvas Workers Chapter of ANG as my reference for stitches. And I decided since I probably would want to pre audition the stitches I would do hearts and when I’m finished will donate these hearts to the Hearts For Hospice program. See my post about Hearts For Hospice project here: (https://sudukc.wordpress.com/2019/10/04/hearts/)
Then as I was adding tape to the edges I decided that if I was going to put all this work into this project I wanted it to be displayed all fall and not just at Halloween. I really never liked the face of this pumpkin, it was scry
looking to me; I’m more the cutesy-cutesy faces. And I always saw the leaf as a separate canvas and maybe a felt leaf too. So before I mounted on stretcher bars I made a pattern of the leaf and then with the copy machine made three different sizes of the leaf. After I mounted canvas on stretcher bars I painted the leaf and face out of the
canvas.
I picked three stitches for the first section and drew them on a piece of my graph paper; then using perle cotton I stitches these designs on a heart. The first heart I just grabbed three colors and stitched the three diagrams I had chosen. As you can see from the stitch diagram and the stitching on the first heart I can’t follow my own diagrams.
But this is okay because I will use the stitch from this first heart somewhere else on this pumpkin.
Sec 1 Area 1: Heart is nothing like the diagram, don’t know where my mind was.
sn note: Threads used:
Diagonal stitches: Pure Palette Silk #1028 Lava
Straight stitches: Pure Palette Silk # 1084 Chinese Red
Upright Cross: ThreadworX Vineyard Silk Dyed #166
Section 1 Area 2 Diagramed one way , but reversed to stitch.
sn note: Threads used
Elongated Cashmere vertical: Weeks Dye Works #5 perle Chrysanthemums #2241
Elongated Cashmere horizontal: Krienik#16 Braid color # 127
Section 1 Area 3 And this one I put 4 small diamond stitches at the bottom instead of top. It wouldn’t be me if I were not self creative! It’s either that or I am attention deficit… no comments please….
sn note: Threads used
Dark DMC #3 Perle Cotton color #920
Medium DMC #3 Perle Cotton color #900
Light DMC #3 Perle Cotton color #922
I have Heart 2 diagramed and stitched, and just pulled threads for this section and am starting this afternoon. I try to stitch a couple hours most every day and watch one of the many movies I have saved on a couple movie aps I use.
I will try and keep you all posted as to the progress as I complete each section. I am going to start my jeans jacket soon as I would like to have it to wear this spring so some days may spend making jacket too.
Thank You for stopping by again.
Hope you find time to do whatever makes you happiest and creative AND I hope you have time to do it today and every day…
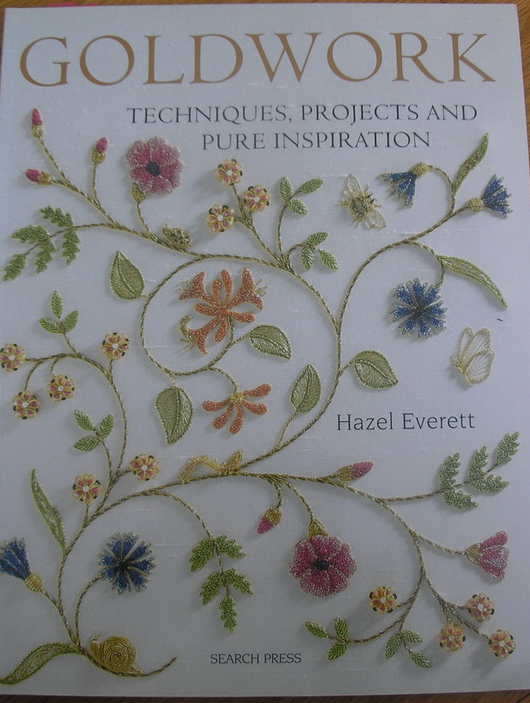
This post is going to be all about my goldwork class but I would be remiss if I didn’t mention another goldwork book I just puchased. Goldwork and Silk Shading, Inspired by Nature by Hazel Everett. Hazel passed away in 2018 but friend and colleague , Jan Barsby and Hazel’s husband, Adrian Richards collaborated to publish this book in her memory. It is a terrific addition to her first book, Goldwork Techniques, Projects and Pure Inspiration. This book explains how silk work and stumpwork can go hand in hand with goldwork. I loved how the book shows many of the examples done in all gold, all silk, and a combination of the two. It is truly inspirational and will give you many ideas. Another thing I found especially interesting was that all the examples of silk work are stitched using DMC 6 strand floss. I am going to add this book to my previous post about books too
Now about Goldwork Lucky Clover is a class taught by Clara Warschauer (clarastitchingstitching.com) and my first real adventure into goldwork. I have taken a couple other classes, I really just audited these classes and never stitched anthing.
This was a 2 session zoom class and I made up my mind to actually try and keep up. After enrolling Clara sent a kit with all the materials needed to complete this clover and looks like enough materials to complete a second. I was a little concerned that there were no written instructions but Clara assured me that everything would be covered in class and that we would have unlimited access to these videos.
As I mentioned before in my blog (sudukc.wordpress.com/2022/01/14/taking-a-goldwork-class/) Clare had a little prework . Before class we were to wrap our hoops and draw the clover design onto the ground fabric. we needed a light and stand and usual stitching tools. Clara had suggested several tools especially for goldwork and I had these already so I was ready. If you would like to learn about wrapping a embroidery hoop Clara has a video on YouTube (https://www.youtube.com/watch?v=wFzYJPPcWlc&t=26s).
The first session Clara showed us exactly what to do and explained everything very well. In class Clara showed us two methods of padding, stuffing and layering felt. Then we use Supper Pearl Purl to outline the clover. She showed us how to make a lasso needle for helping to take our gold to backside of work and secure. She also has a video for making a lasso needle: https://www.youtube.com/watch?v=ejkiKjkKioI. She also showed how to stitch the stem and how to lay Japanese threads in the first petal.
I had begun stitching with here but by the time she had stitched all the felt in place and started on the outlines, I was still stitching the green clover (step one) to the ground. Needless to say I decided to stop what I was doing and to listen and take notes. I was glad we were going to have access to the viedo too because I was sure I probably missed a hint or two.
So during the first week between classes I diligently went to my stitching nest and stitched my clover, I wanted to keep up and not let the class get ahead of me. One of the major things I learned is that goldwork is not going to be a social stitching piece. You need concentration and and attention to detail for this technique. I imagine it is much like Japanese Embroidery with much attentions to technique and application of technique to truly master this media. I spent about 8-10 hours of stitch time just to complete the first part. But I liked the solace of the stitching time. I lost all sense of time and space.
I completed the homework and was waiting for the next class which took us through the rest of the stitching and how to finishing. This class I just took notes and knew I was in for another 8-10 hours of stitching before I was going to attempt the finishing. I was also happy this class was also taped for our reference too. I think I watched this tape a couple times just for the finishing .
It took me about ten days to complete this project, not because it took me longer to stitch but because I had a couple other commitments and I wanted to have blocks of time to stitch. Once my clover was completed I knew there were quite a few faults but it is my first piece and I will keep practicing. I am going to make another and I know that I overstuffed the first clover and my stem left much to be desired. And I really need practice cutting purl, I had lots of little tags on my chipping that I needed to clip off. And a couple chippings were unusable but I’m going to save them, never know when you might need a pulled purl. But as my friend says; “If you are close enough to my stitching to see my mistakes , you are too close.”
And that’s about it for today. I am working on a new sewing project that I’ll share later, I have loads of finishing needlepoint to do and I’m going to make another clover soon before I start another project. I also need to start a solcial needlepoint I can take to sitch-ins and other places. I did get out a guild project I thought I could do but as I read the instructions I realized this was not a project that I wanted to do, so I will keep the golds and make another clover before I attempt one of the other kits I have in waiting.
Thank You for stopping by again. Hope you find time to do whatever makes you happiest and creative AND I hope you have time to do it today and every day…
My mother should have named me Alice because I can fall in a rabbit hole in a nano second. I can wander so deep into that rabbit hole that I am never sure where I started nor what my original destination was and I have no concept of time either. . I can go from Apples to Zebras with a click of the mouse and the day is gone.
In fact while exploring a subject I even came up with a design I want to design and stitch. I’ll tell you more about it later…Yes I wrote it down so I won’t forget.
My latest rabbit hole has been Goldwork…and I guess you should add silk work and stumpwork too, but mainly goldwork. Here are some great sites to visit and if you want to fall way down the rabbit hole check out some of the sites and blogs these artists like… and I will see you next month.
Some of these sites allow you to follow their blog; they may have mailing lists, Facebook, Instagram, Twitter and You Tube viedos you can join. They sometimes also list other sites and people they like or follow…let your rabbit hole adventure begin.
I used to belong to a site that let me know when a new blog had been posted to my favorites list but it got to be too much and I would be 2 hours just reading new posts. I still belong I just don’t have them tell everyday how good some people are about writing their blogs, that depressed me. And in my defense WordPress has changed their format on me and I am still trying to sort this out. And I inadvertently changed my blog format and mine was so old that I can’t get it back. So I am not only trying to figure out what I am doing but also how I want it to look.
Okay back to goldwork…here are some great sites to visit and explore if you don’t already…just remember I am not responsible for the rabbit holes you may fall into exploring these wonderful places.
And them further down the rabbit hole you can Google these just for the images… Lucy Barter Margaret Light Embroidery Karen Newbrook Merrilyn Whittle Designs
I didn’t list all the places I visited, you need to explore for yourself, just enough to get you started. The whole world is out there just waiting to be explored. I keep a trail of my visits so I can go back to the original…bread crumbs if you like. I write down original site Artist A: then if its from her list of favorite blogs I list Fav-blos ‘artist name….and so on because that artist may have a list too… See what I mean about falling down a rabbit hole.
In a couple days I’ll be back and show you my Lucky Clover it is complete and I ws going to start another goldwork project, but the one I thought I would start turned out not to be what I thought it was so I am rethinking my project. And at some point have to figure get comfortable with WordPress again.
Thank You for stopping by again. Hope you find time to do whatever makes you happiest and creative AND I hope you have time to do it today and every day…
Well!My goldwork class does not begin until Today. At first I was bummed out but then I decided to take Monday and write up my goldwork books. And yes I have read all these listed. I take notes and put them in the book for reference. Then on Tuesday tried to upload to my computer but WordPress has changed so much since I last used that there is a whole new learning curve. But I hope to have up before class begins on Wednesday. After several hours, this is as good as it is going to get until I have more time to become user friedly with WordPress…
I have more than 20 goldwork books but some I never use or even look through, so I am only going to list the ones I keep handy and together on the bookshelf. Some books that are less used are designated to top hard to reach shelves. It also pleases me that books are still being written about this technique, not only teaching the basics but in some cases “pushing the envelope.” If art is to succeed and grow it must not only adhere to the basics but also reach to the future.
Goldwork is not always a technique unto itself. Sometimes other embroidery techniques complement goldwork like silk embroidery, blackwork, stumpwork and even canvaswork (my first love). Some of the techniques and threads used in goldwork may be used in these other stitching disciplines also.
At first I was going to list the books in the order I like them best but then I realized I like all of these for different reasons, some I just like the eye-candy ideas/designs, some I lust over and hope maybe someday will live long enough to accomplish.
Also some books I prefer the layout to others and that’s not so say that the information in one book isn’t just as good as an other’s information. How I use these books is if for example: I am looking up how to use card in a project. I will look at all these books and mark with a post-it note all those that have information on how to use card. I will review each and decide which is best for my application and proceed. It’s like choosing which stitch to use where in canvaswork, there is no one perfect answer, only the one you chose…It’s a personal preference, like I like blue more than orange. This is true of the projects given in each book, some I like better than other and my choices may different from yours. So with this in mind and not to show personal preferences, I have decided to list my go-to goldwork books in alphabetical order by author.
I also tried to contact several of the authors with more recent publication dates to get their permission to use pictures of the covers and a page layout inside. I am a firm believer in copyright laws and anyway it is just common courtesy to ask permission. Some of the books are older and I did not try to contact these authors as there is a educational exemption in the copyright law. The authors I sent and received permission to use are noted with an asterisk (*), and Thank you again. (I will update if I receive others.)
Chamberline, Ruth; Beginners Guide to Goldwork; Search Press; 2007. A study of the sampler featured on the cover of the book. The book covers materials, equipment, designing, getting started, stitches and techniques used in sampler. There is also an acorn project at the end of book with instructions.
*Cole, Alison; All That Glitters; Search Press; 2006.This book is written in two parts; the first are the stitches and techniques used to complete the stumpwork and goldwork projects in the second part of the book. The second part of the book are ten (10) projects, each with a color picture, a list of requirements (materials and tools), line drawings to include master drawing and templates for felt and leather as required. There are also complete instructions with cross references to part 1 for techniques and methods. A lovely book and truly eye-candy for any goldwork enthusiast.
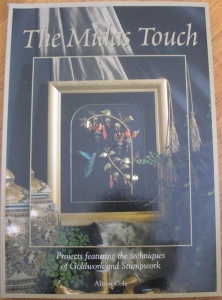
*Cole, Alison; The Midas Touch; Allison Cole Embroidery; 2008.Second project book published for stumpwork and goldword. This book is a similar format to the first. It has two parts; the first includes the threads and techniques used to complete the projects in second half of book. In the second half of the book eleven (11) projects are featured; each with a list of requirements (materials and tools), line drawings to include master drawing and templates and complete instructions with cross references to part 1 for techniques and methods. Another lovely book and more eye-candy for any stitcher.
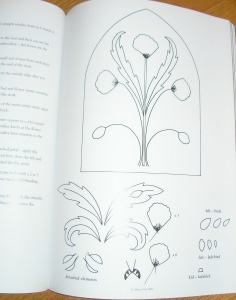
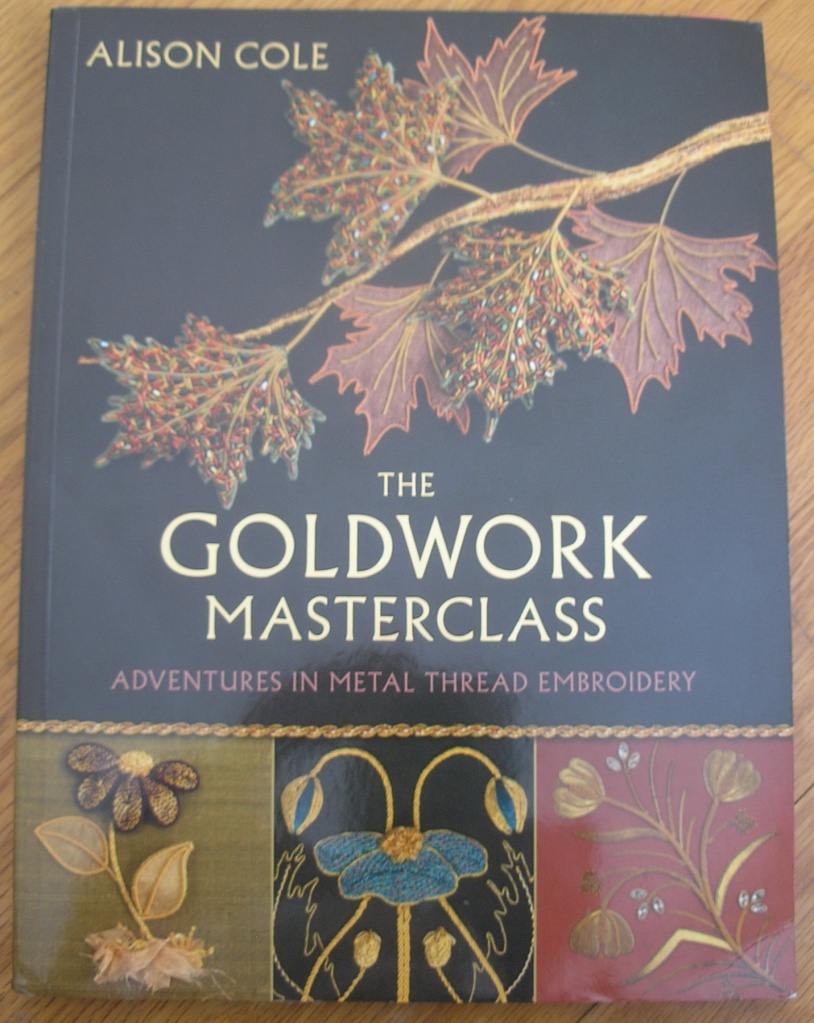
*Cole, Alison; The Goldwork Masterclass; 2019This book was written as Allison Cole’s Masterclass for the Embroiderers Guild of Victoria (Australia). It is reference book with glorious pictures. Each chapter has a stitched sampler plate at the beginning (sudu note: I think these are worthy of framing) and that same plate at the end with a key reference to the sampler. And in between these two plates is an overview of the methods and techniques used in the chapter each showing the technique. A beautiful book, truly inspirational.
Dawson, Barbara; The Techniques of Metal Thread Embroidery; B.T.Batsford Ltd.; 1985A refence book with extensive history and discussion of metal thread technique. The book has all blank and white pictures, buy is a handy reference book.
Everett, Hazel; Goldwork Techniques, Projects and Pure Inspiration; Search Press; 2011.The title says it all; thus book covers a brief history,equipment, translating images to designs, order of working, metal threads, techniques and methods. It has projects with color pictures, line drawings, materials list techniques listed and order of working design.
*Franklyn, Tracy; New Ideas in Goldwork; B.T.Batsford Ltd.; 2002.This book not only explores traditional goldwork techniques and methods but also explores some “Out of the box” methods and techniques. It is nice to see the exploration of this technique being pushed to new levels after first understanding the basics of the goldwork techniques. It also has other artists designs with their artist statements. A true eye candy book for any goldwork enthusiast.
Kreinik, Jacqueline Freidman; Metallic Thread Embroidery; David & Charles; 2000A look at Kreinik metallic threads with color chart at the time of publication (sudu note: some threads have been discontinued and others added). It has over a dozen designs incorporating Kreinik threads to stitch. It is a useful reference for using Kreinik threads.
Lemon, Jane; Metal Thread Embroidery; B.T.Batsford Ltd; 2004. A Reference book in Alphabetical order of tools , materials, techniques and places to visit around the world. A great reference tool for anyone specializing in metal embroidery.
Lomny, Anthony; The Art and Craft of Goldwork; Simon & Schuster; 2004There are fifteen (15) goldwork projects in this book. Each project has a color picture, materials list, line drawings and description of the methods used.
McCook, Helen; Goldwork Royal School of Needlework Stitch Guides; Search Press; 2012This is the smaller edition of the RSN books. Small compact study of goldwork with clear and concise pictures and text. There are no projects in this book.
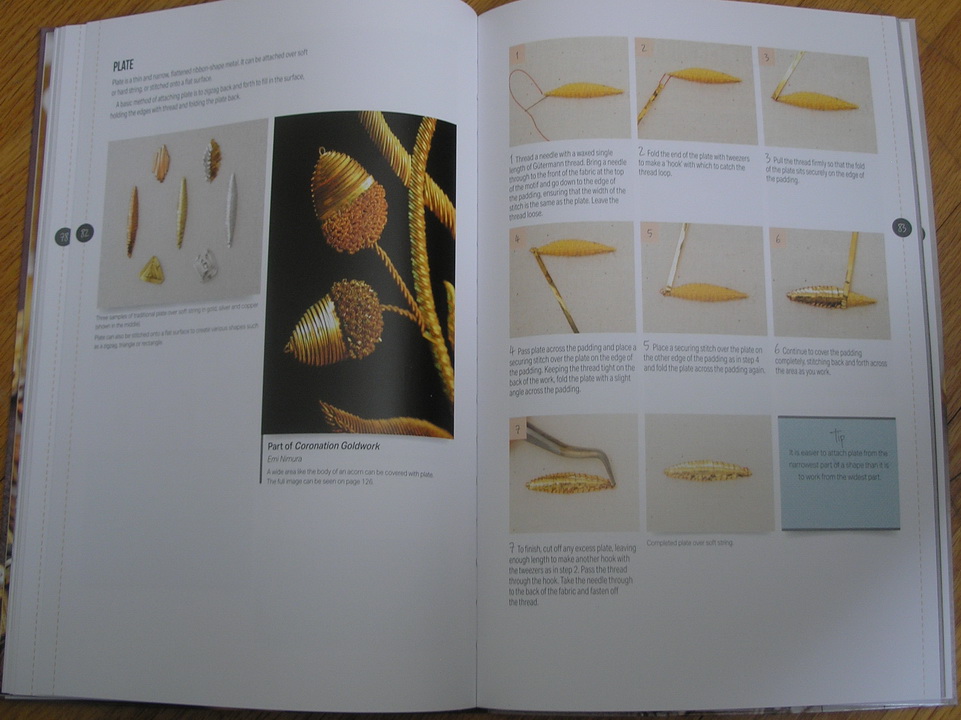
Nimura,Emi; RSN Book Goldwork, Techniques, Projects and Pure Inspiration;; 2021This is the larger edition of the RSN books. There are two parts to this book: the first covers materials, tools, method of stitching, framing up, order of working, methods and techniques of goldwork. The second part of the book are projects and a gallery of inspiration. Projects are complete with materials list, templates, color pictures as well as the+ order and method of stitching the project.
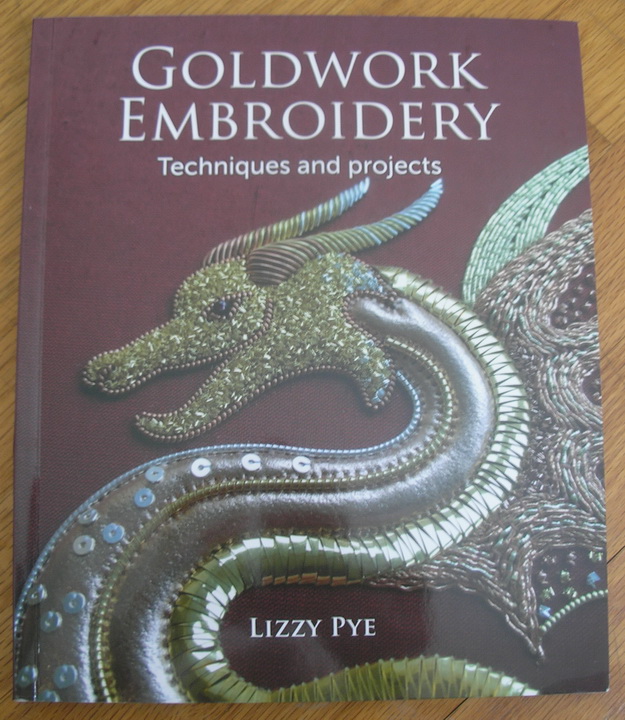
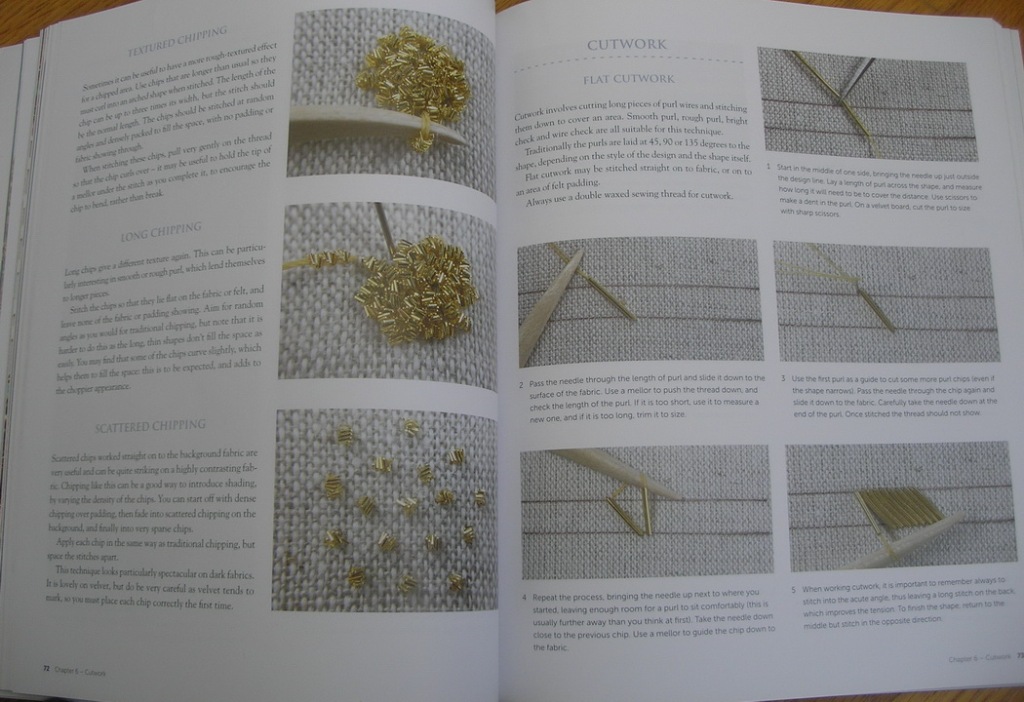
*Pye, Lizzy; Goldwork Embroidery Techniques and Projects; Crowood Press; 2020. A complete study of goldwork from materials to techniques and even finishing suggestions. The pictures and instructions are great. There are six (6) projects complete with materials list, equipment needed, line drawings for project, felt and leather templates’ and step by step instructions. Another truly beautiful book.
Pyman, Kit-editor; The Maderia Book of Gold and Silver; Search Press; 1988This book covers Goldwork, Machine /embroidery, Lettering, Church Embroidery, Beadwork, and Tambour Beading by many different well known embroidery artists This book uses ,mainly Maderia threads but is full of design ideas and inspiration.
Goldwork Revised and Expanded; Search Press; 1995This is a condensed book of Goldwork portion of The Maderia Book of Gold and Silver edited by Kit Pyman (see above)
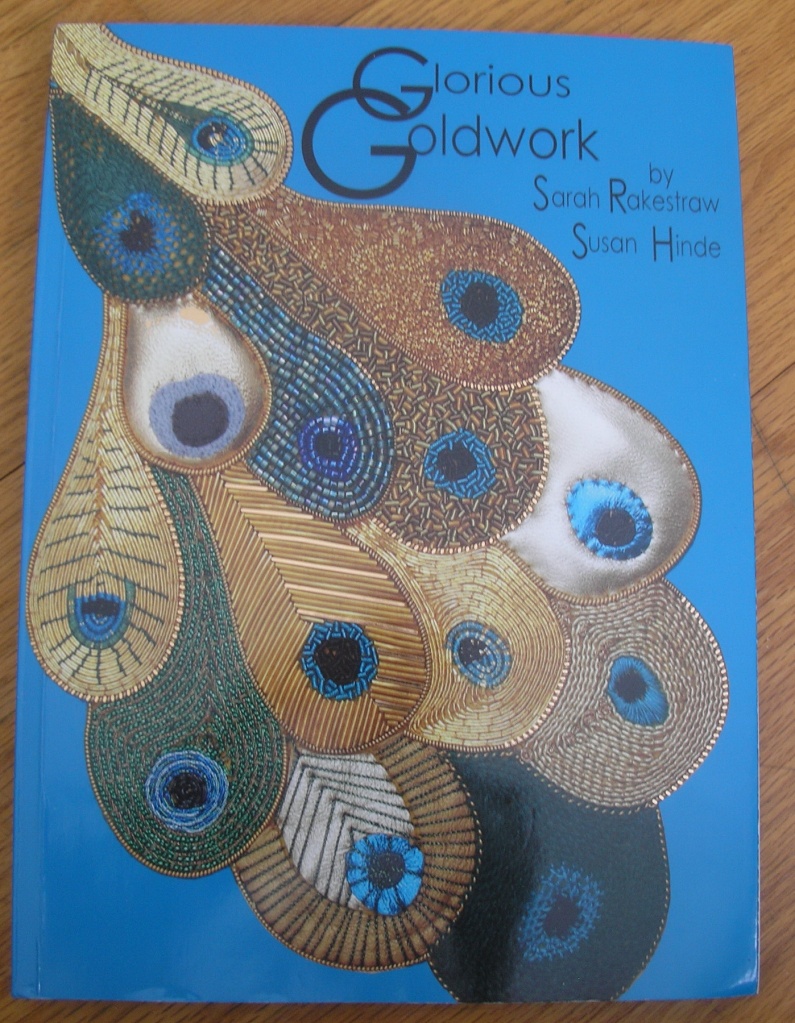
Rakestraw, Sarah and Susan Hinde; Glorious Goldwork; Golden Hinde; 2018.Complete book of Goldwork studies with pictures from tools & Materials to techniques and methods.Each technique or method is explained step by step with pictures. Nine (9) projects are included in this book with requirements, line tracing (drawings, leather,felt & card tracings, and the method of stitching. I liked the corners of the pages that give you an idea of the method or technique on that page.
Saunders, Sally-text by; Royal School of Needlework Embroidery Techniques; 1998.This book is an introduction to silk shading, crewel work, Blackwork and goldwork. It is published by the Royal School of Needlework and all these techniques can be used with goldwork. Designs in this book are well thought out and inspiring.
Scott, Anna; A-Z of Goldwork with Silk Embroidery; Country Bumpkin Publications; 2008.This book has 2 parts: The first being the technical part including materials, methods and techniques and the second part is seven (7) projects complete with materials and techniques used.This is an A-Z book and they are always good.
These books are good too but not strictly goldwork…
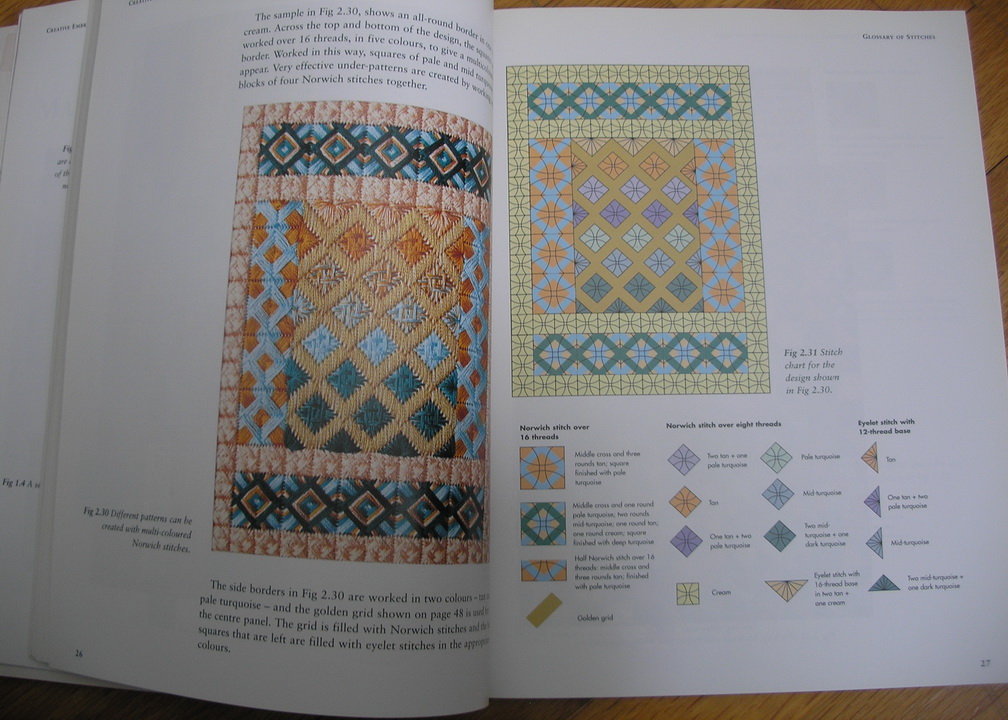
Ashby, Daphne and Jackie Woolsey; Creative Embroidery Techniques Using Colour Through Gold; 1998.This is not a goldwork book but does use gold threads stitched on needlepoint canvas. I included this book because I am at heart an Needlepoint person who loves geometries. This book is eye candy for my passion.
Jane Nicholas; Stumpwork & Goldwork inspired by Turkish, Syrian & Persian Tiles.Stumpwork, Goldwork and surface Embroidery Beetle CollectionAny Jane Nicholas book is eye candy for a needlework person. These two just happen to have goldwork in their titles and use goldwork in their designs.
I have other books that include goldwork but are mainly other needlework techniques but are still eye candy for the soul. I am cursed or gifted with a memory of most of my books and by just looking through my library can spot books that might have eye candy for the technique I am researching. I did not include them here as I felt this list should include mostly books that were methods and techniques of goldwork.
Thank You for stopping by again.
Hope you find time to do whatever makes you happiest and creative AND I hope you have time to do it today and every day…
My first new adventure for 2022 is a goldwork class. I have several goldwork projects and ideas I would like to do but have had very little instructions in this media.
I audited a class from a local guild teacher, but didn’t do any actual goldwork. Our guild also had a teacher come for a class but it was more of a design class in goldwork than an actual hands on class. And I did computer work for a goldwork class (Golden Petals) taught by Toni Gerdes (www.tonigerdes.com) but I didn’t have time to stitch this one either.
I have 3 or four goldwork kits I’ve purchased and a couple projects on my drawing board I really want to stitch. So although I’m familiar with the technique I have never actually been in hands on class until now.
I am signed up to take a goldwork class with Clara Warschauer (www.clarastitching.com) . It is a small Shamrock and I can hardly wait, class starts Jan 17th.
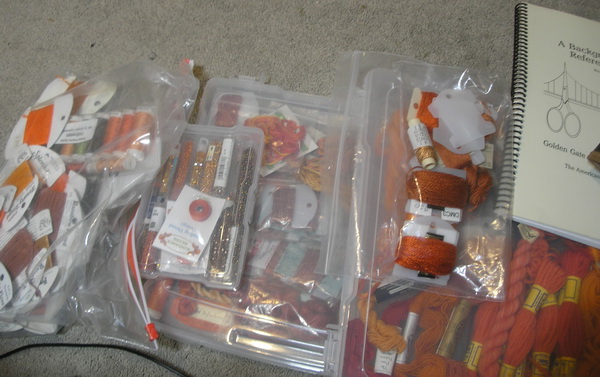
Before my mother started a new project she would gather up every conceivable supply, tool, book, whatever she thought she might need to successfully complete the project. I am my mother’s daughter in some ways and I have been gathering up supplies for some time. My mother always had everything meticulously organized and although I fight organization I find myself being exactly like she was sometimes. So..
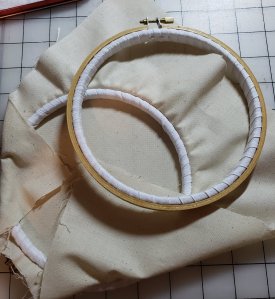
My class project has its own little box with every thing that came in the kit plus I have print off pre-workout instructions, wrapped my hoop and marked my pattern.
I wrapped my hoop with bias tape and drew my Shamrock on the fabric. Both hoop rings are supposed to be wrapped with woven tape ( I bought my tape when I bought my frames), cotton strips of cloth or bias tape. I did this but first one was so tight didn’t think I would get fabric on the frame and be able to tighten screw. So I only wrapped inner hoop on second frame as a back up; but fabric did fit…wonder of wonders.
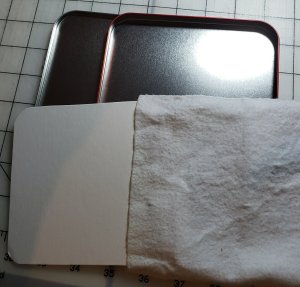
Clara asked that we have cutting board to cut metals. I happen to have one from one of those guild class I audited. It is a computer disk holder, a polishing bag (you used to get these free in hotel rooms to buff your shoes or some high-end make- up companies put some of there products in these soft bags. And my bank gives away eyeglass cleaner cloths that work.) and a piece of card cut to fit box. You also can make on by just cutting a piece of velvet or felt to go around card…or if you are handy with sewing machine, make a bag. Put card in bag and place in tin.. and you have a cutting board with lid …this will be handy if you have extra gold cut and have to stop stitching (heaven forbid.)when you have a box with a lid, just put a lid on it and when you return everything is where it should be. Handy tip for those who have little friend around.
Clara also asked for goldwork scissors. I am covered here, I have every type of scissors imaginable. From top down: double curve, curved blade, snippet scissors, goldwork scissors (serrated edge), new embroidery scissors and surgery scissors ( one blunt tip). I have others types8 handy in my sewing room too.
She also said a mellor and a light box would be nice but optional. I have a mellor and I made my light box. I use a plexiglass see though ruler (made for quilters and used with rotary cutters), fabric weights but four of anything of same height would work and my phone with a white image and full brightness on the screen or a small flashlight to fit under board. Or use window; tape design on window and tape fabric over…nature’s own light box.
A stand is needed and I have stands…floor stand, lap stand and a clamp. Don’t know which I will use yet, but will let you know and why.
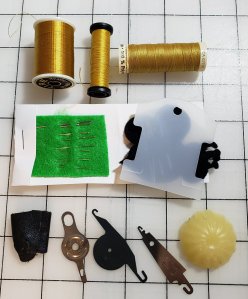
But that’s not all I’ve collected for my class, after all I am my mother’s daugter. I have this carrying case with most all my goldwork tools in one place.
Extra needles… the container holding needles is a Q-tip travel container. You can get them at discount stores or drug stores, they cost about a dollar and you get q-tips too (I think I had quite a supply of q-tips for a while)
I have gold thread( silver thread in drawer), extra felt with spare needles,, a thread bobbin, a thimble, needle threaders (because one does not always work), and beeswax.
Tweezers: read you should learn to use and not touch gold much. The oil from your had may tarnish gold. Also have read to wash hands but don’t use hand lotion…oils again. I have blunt tweezers, pointed tweezers , very pointed tweezers, and bent tweezers.
And miscellaneous stuff that I usually always have when I’m stitching. A light and dark lap cloth; if you use this under your needlepoint makes holes easier to see. I thought it might be useful under cutting board in case some gold pops. My extra eyes…don’t go anywhere to stitch without them. A ruler with metric measurements. And an ort box, although I don’t think any gold will be thrown away. And a good light source. I have several choices plus windows. And finally my stitching buddy; Jiminy has been with me for a long time.
So as you can see I am ready and waiting …can you tell I am excited? I’m going to bring my computer, notebook and phone up to my sewing room this week end to make sure I have good zoom reception otherwise will have to stitch in my office…guess I better clean a spot…it’s still a mess.
I’m also going to read more of the goldwork books I have collected this week-end. I’ll report on these later..
Thank You for stopping by again.
Hope you find time to do whatever makes you happiest today. Used to say stitch but whatever makes you creative, hope you have time to do it today and every day…
Someone asked me if I was ever going to blog again and at first I had no answer for them. The more I thought about it ,the more the idea appeals to me. I am never going to be a you tube person, I can barely do the little I do with my smart phone, tablet and computer. Add more, think not; unless of course it would come with another me to do the extra work. So if you can read through a blog now and then I’m still here.
2019-2021 has been a real challenge for many of us not only physically but mentally too. And I’m not sure it’s over yet. But life goes on and there is so much to learn and do
I have been a needlepointer for more years than I can remember and I have always wanted to learn goldwork and stumpwork. So I have decided to take a few online classes and read about goldwork and stumpwork this year…will share more later.
I also have a sewing room again and a pile of needwork to finish, so I will be finishing needlework this year and if I can remember to take pictures will share.
I’m going to do some sewing and if it kills me will learn to knit too. And of course i still love beading and needlepoint. So I am planning on a busy year, so stay tuned, it is going to be a busy year.
Hope you find time to do whatever makes you happiest today…
I have had a few people ask me how to do this, so I so I am sharing how I do it.
First I researched what I was selling; I Googled, I looked on other selling sites (including EBay and Amazon). I made notes of prices if exact match or close. I made notes of descriptions. In short I did my research.
Then I went to Facebook, and checked needlepoint selling sites; when I first started there were only 2-3, now there are 8-10 and that doesn’t include Ebay and Amazon. I noted how many members they had, how often posts were listed, and if there seemed to be some active traffic and selling. I read their rules (but if you miss something the administrators will usually let you know.) Let me add a note here: the rules have changed over the years and some sites have more rules than others.
I also noted who was selling on these sites and if there were people whose names I recognized I watched their posts to get an idea of how they were listing their items, if they were selling, and noted their pricing.
You need to spend some time checking out the sites and decide which site(s) are best for you.
I keep two files: A spreadsheet with columns and a formula: my columns are (underline column heading)
Control Number ### (PayPal will give you an invoice number and a transaction number: I use the last three digits of the invoice number and the last 4-5 numbers/letters or the transaction number- Example 001…1234A),
Name of the Items (I use designer or author name if known too, Example: MShirley Thimble Angle or Author-Book title),
Selling Price (this may change if you mark down),
Fees (PayPal and Ebay have them),
Mailing Cost
Net this is my formula column (=sum(sell-fee-mail)
Buyer Last name
Tracking Number: I do not send anything I cannot track.
The other file I keep is a word document that has my pre-listing info. I came up with a format for me and I pretty much stick with it (unless administrators want sometime more or less and then I adjust this format OR pull the item and find another site to use. Before I list an item I have the following information written down in a master word file.
Description of Item: Needlepoint canvas- be very descriptive
Example: MShirley Thimble Angel canvas
Asking Price and date:
Example: $00.00-month-day-year
(I do this so if I reduce I can show new date too)
Example: reduced$00.00 date ($00.00 date) this is original price
Note: I do not reduce second time. I pull the item if it does not sell and may at a later date re –list at original price OR just donate or sell to used book store.
Designer/Author: if known
Original cost: if known
Size of canvas/book: measurements
Size of Design area: ONLY area to be stitched (needlepoint canvas only)
Condition: (new-used-partially stitched- old- fair- poor) I usually add whether it is smoke free home and whether a pet lives with you. I have a note here too…I have sold things for a third party and unless the third party lets me know the smoke and pet status, I leave it out.
Postage & handling: type and who pays—
Note: I use either first class or book rate; I round the postage to nearest .50 Note about book rate…if you purchase postage through PayPal there is a tracking # for book rate; if you go to post office there is no tracking number available. I also add the cost of the envelope.
US shipping only: some people don’t mind shipping out of the US but even Canada has additional paper work and cost
Comment “Me Please”
This is what a book listing might look like: (would also have pictures)
Item: Basics and Beyond
Selling Price $10/ 9-1-20 (only price shows on listing )
Author: Janice Love
Original cost: $15
Publishing date – 1990
Number of Pages: 50 pages
Book dimensions -8.5 inches x 12 inches x 1/4 inch
Soft cover. A beginner’s guide to Hardanger. 12 stitches are featured and diagrams and photos are excellent. 8 designs are available. An excellent reference book.
Condition: Excellent There is a small tear on a page (see picture) Smoke free, pet free home. Postage will be Media Mail $5.50 (my standard price)
Payment method: PayPal
USA shipping only
Comment “me please” below if you would like to purchase.
Hope this helps and good luck selling…
Thank You for stopping by again.
I hope you have time to stitch today and every day…
Been a long time since I blogged and I have no excuses. All I can say is until this awful Covid shut down I was having the time of my life trying new things. I think I have mentioned I was learning to crochet again and learned to knit too. I will probably never be an expert at either of these crafts but I do enjoy them and wish I had more time to do everything I would like to accomplish.
Lily of Valley Necklace
I have discovered I really like beading. I’m not much into jewelry but have
Spinning Star
made a few necklaces and will continue to make an occasional piece BUT the 3D pieces are so interesting to me. I love the boxes that are available to make and want to be able to design my own. I like the stars, but you can only have so many stars. Although the spinning stars designed by Franklin Martin Jr (https://www.facebook.com/groups/2700808173532468) are very cool. I took his Zoom class and I made one (wrong of course); mine has eight points, should have ten points. But I made it work and I love to spin it.
shapes
Franklin Martin Jr is also part of the group CGB: Contemporary Geometric Beading (https://beadmobile.wordpress.com/). I have long been fascinated by this group but I’m not sure I understand it all …yet it is fascinating stuff. I bought their first two books years ago and love to look at them but am not an experienced enough beader to understand this concept yet.
Last week I spent a week taking or participating in International Bead Week. This is probably one of the few good things to come out of Covid shut down. The Beadworkers Guild of UK (http://www.beadworkersguild.org.uk/) holds an International Bead Week the first of August and this year they were offering it online since the world is in quarantine. What a lovely break for the beading world…several times we met online just to chat about beading; there were beading classes online and many free patterns to stitch. It was truly an international event and I met people from all over the world who love to bead.
I also heard about The Johnson Solid projects. Diane Fitzgerald has been heading a project where 92 beaders are making a Johnson solid in bead: See Facebook: Johnson Solid Project for more information (https://www.facebook.com/groups/2265910877041556/) These fascinate me and now the beadworkers Guild are also doing their own project for display at their International beadwork meeting hopefully next year.
Black-and-White-Together-Project.php). I stitched 8 warped squares that have been sent to South Carolina where they will be stitched into a yet unknown artwork.
Heart For Hospice
And of course there is my first love needlepoint. I still enjoy needlepoint but you can only have so many pillows and stand ups. And truthfully I’m not convinced my sons or their wives appreciate the love, work and $$ involved in needlepoint.
Right now I am working on the thimble figures from Melissa Shirley’s nativity. I’ve had
MS Nativity
these pieces forever and just never got around to stitching them. But during shut down I decided it was a good project. I also decided that I was going to stitch them all in silk with a little Kreinik for glitz and they are all stitched in Basketweave. No pressure to pick threads or stitches, just a relaxing time. I can finish one every two days if I keep my beading to a minimum…I have been trying to get one done every week or so. (that beading really has me hooked)
And since my beading library is growing I have been thinking that I need to reduce my needlepoint, quilting, color and design libraries and to that end have been separating the books into keep and sell shelves. I will keep the books that I love to look through and those that pertain to subjects I am still interested in stitching …i.e. goldwork, some ribbonwork stumpwork and a few others. I do not need the extensive library I acquired when I was studying to for teacher certification and when I was designing, so in the next few weeks I am going to begin to offer some of my library for sale.
Each book is like an old friend; see my blog about my book friends: ( https://sudukc.wordpress.com/2009/04/01/books-are-friends/ ) So this has turned out to be a more difficult project than I anticipated as I have been going through each book and it has brought back many memories. My mother purchased many of the books when I first started, I bought many at my first national needlepoint convention, and I met a very dear bookseller that invited me to his home to search for more books. I love the color pictures, you can see the changes in our color choices and pattern tastes over the years. This is becoming a real trip down memory lane and more difficult than I imagined it would be.
I was looking in a Maggie Lane book and I love her reference to stitches to use: “…two basic flat stitches , and three bump, or lump stitches.” We’ve come a long way since the 70’s. Out charts are computerized now and I must say some old photography is pretty comical now. But the one constant is the love of stitching, color and design. Tastes change but basic color and design rules are the same.
I have come to the conclusion this is going to be a long, difficult task for me; so I have decided to do it in stages maybe 10-15 books at a time. I will write the description, take the pictures and place them online and monitor them. But I have also decided should any of my blog readers be interested, if you send me and email at sudu@kc.rr.com I will send you my lists as they became available. I will send the list to blog participants a week ahead of posting online and I will update the lists as I go. It will be strictly a first come, first serve bases.
And so that’s what I have been up to for the last year…beading, needlepointing with an occasional try at crochet or knitting. I still help out with a few teachers and shops that need graphs. I plan on continuing to writing my blog. I want to document some more finishing for anyone interested.
And I am now on path to simplify my footprint.
I just found this in my notes; I have no idea how old it is or where it came from but it is such good advice in this strange time.
Creative Dry Spell remedies:
Spend some time with your stash
Finish a UFO or several
Practice a stitch/technique you haven’t mastered or would like to learn
Look ahead to projects you must finish
Just keep active.
Thank You for stopping by again.
I hope you have time to stitch today and every day…no matter what media you chose.
I haven’t been ignoring my blog but I have been busy designing needlepoint hearts and making beaded butterflies. But, I have been remiss in writing about my guild’s philanthropic project, Hearts For Hospice.
Guild members (really anyone who wants to help on this project, you do not have to be a guild member) stitch hearts; Sue and her 12 year old Grandson, Jon, make the twists (DMC #3 perle) to finish the hearts, Georgia and Sara (and sometimes we have a finishing day) finish these hearts at no cost and the hearts are donated to three (3) local Hospice Houses, one is a children’s home.
Maybe you saw the article in ANG NeedlePointers, Jan/Feb 2019 and May 2017; Needlepoint Now, January/February 2019, and on Facebook.
It all began when our friend Georgia went over to “The Home” at her retirement community to volunteer. They asked her if she had received her flu shot and of course she had not (doesn’t like them or maybe they don’t like her…can’t remember), so she could not volunteer. A staff member saw hearts Georgia was stitching and inquired about them and asked if she could make more. Knowing she could stitch a heart, she returned home and started making hearts and that’s how it began…one heart at a time.
Within the month she had convinced several of her friends to join her and soon it became a project and another friend, Sue Hart organized us into a philanthropic group and offered the project to our guild as an ongoing philanthropic project.
Side note: did you know that all non-for-profit organizations need a philanthropic program to qualify as a 501(3)(c)? I didn’t but it makes sense if you are a non-for-profit organization that you would do something. I know our national bylaws state that our purpose is to teach, promote and preserve the art of needlepoint but I did not know you need to have an ongoing philanthropic project.
We have encouraged members to just try a stitch and variations. These hearts make great doodle canvases. Then if you take a picture of it you will have a permanent copy and a family will receive a lovely remembrance. We have also encouraged needlepointers to take the painted canvas they thought they couldn’t live without, but have now become less likely to finish and make a heart(s) out of the painted canvas. There are two hearts from a painted canvas in this picture.
Barbara Richardson; a friend of GKCNG members and past president of ANG adapted her heart design for us to use. We use it to teach groups of needlepointers how to start and some first time needlepointers. We even have a class that shows you how to finish these hearts.
Several months ago Colour Complements: https://colourcomplements.com/ embroidery threads sent me samples to hand out to guild members I had several left over and so I stitched hearts with them and sent pictures to Colour Complements. The owner contacted me and I have designed a couple hearts for her use (soon to appear on her website, I think).
This summer, one of the bead groups I belong to posted a beaded butterfly and I stitched those for some hearts. I asked permission of the designer, Patricia Parker to stitch them for other hearts and she gladly gave her permission. So guild members that request butterflies for their hearts will get one and I have made several for the two finishers to use at their discretion.
We (I use this term loosely, because I am but a small part of this endeavor) have been doing this for the last four years and have completed over 1400 hearts. We have received hearts from 26 states and 2 countries. There are at least three other guilds that we know about who have started their own program.
If you or your guild would like the information, contact Sue Hart at Heartsforhospicegkcng@gmail.com
If you have any #5 or #3 perle cotton or #12-16 Kreinik Braid (Ribbons work too), or any thread suitable for cording laying around, it needs to be skeins not cut. And you don’t know what to do with it , Hearts For Hospice would be happy to use it. Just contact me or Sue Hart.
I have designed another heart in two colorways for our Hearts For Hospice program and I will PDF you the instructions for free These hearts used Colour Complements Overdye, DMC #5 perle cotton, and Kreinik #12 braid but any of your stash will work. All I ask is that you please stitch one for our Hearts For Hospice program and return to them. All the information to return to Hearts For Hospice are in the instructions. Thank you.
Thank you for stopping by, I hope you have time to stitch today.