Hearts

I haven’t been ignoring my blog but I have been busy designing needlepoint hearts and making beaded butterflies. But, I have been remiss in writing about my guild’s philanthropic project, Hearts For Hospice.

Guild members (really anyone who wants to help on this project, you do not have to be a guild member) stitch hearts; Sue and her 12 year old Grandson, Jon, make the twists (DMC #3 perle) to finish the hearts, Georgia and Sara (and sometimes we have a finishing day) finish these hearts at no cost and the hearts are donated to three (3) local Hospice Houses, one is a children’s home.

Maybe you saw the article in ANG NeedlePointers, Jan/Feb 2019 and May 2017; Needlepoint Now, January/February 2019, and on Facebook.

It all began when our friend Georgia went over to “The Home” at her retirement community to volunteer. They asked her if she had received her flu shot and of course she had not (doesn’t like them or maybe they don’t like her…can’t remember), so she could not volunteer. A staff member saw hearts Georgia was stitching and inquired about them and asked if she could make more.  Knowing she could stitch a heart, she returned home and started making hearts and that’s how it began…one heart at a time.

Within the month she had convinced several of her friends to join her and soon it became a project and another friend, Sue Hart organized us into a philanthropic group and offered the project to our guild as an ongoing philanthropic project.

Side note: did you know that all non-for-profit organizations need a philanthropic program to qualify as a 501(3)(c)? I didn’t but it makes sense if you are a non-for-profit organization that you would do something. I know our national bylaws state that our purpose is to teach, promote and preserve the art of needlepoint but I did not know you need to have an ongoing philanthropic project.

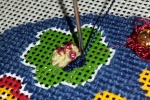
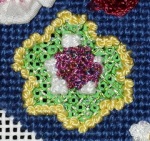
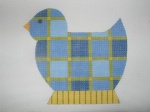
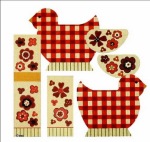
We have encouraged members to just try a stitch and variations. These hearts make great doodle canvases. Then if you take a picture of it you will have a permanent copy and a family will receive a lovely remembrance. We have also encouraged needlepointers to take the painted canvas they thought they couldn’t live without, but have now become less likely to finish and make a heart(s) out of the painted canvas. There are two hearts from a painted canvas in this picture.

Barbara Richardson; a friend of GKCNG members and past president of ANG adapted her heart design for us to use. We use it to teach groups of needlepointers how to start and some first time needlepointers. We even have a class that shows you how to finish these hearts.


Several months ago Colour Complements: https://colourcomplements.com/ embroidery threads sent me samples to hand out to guild members I had several left over and so I stitched hearts with  them and sent pictures to Colour Complements. The owner contacted me and I have designed a couple hearts for her use (soon to appear on her website, I think).


This summer, one of the bead groups I belong to posted a beaded butterfly and I stitched those for some hearts. I asked permission of the designer, Patricia Parker to stitch them for other hearts and she gladly gave her permission. So guild members that request butterflies for their hearts will get one and I have made several for the two finishers to use at their discretion.

We (I use this term loosely, because I am but a small part of this endeavor) have been doing this for the last four years and have completed over 1400 hearts. We have received hearts from 26 states and 2 countries. There are at least three other guilds that we know about who have started their own program.

If you or your guild would like the information, contact Sue Hart at Heartsforhospicegkcng@gmail.com

If you have any #5 or #3 perle cotton or #12-16 Kreinik Braid (Ribbons work too), or any thread suitable for cording laying around, it needs to be skeins not cut. And you don’t know what to do with it , Hearts For Hospice would be happy to use it. Just contact me or Sue Hart.

I have designed another heart in two colorways for our Hearts For Hospice program and I will PDF you the instructions for free These hearts used Colour Complements Overdye, DMC #5 perle cotton, and Kreinik #12 braid but any of your stash will work. All I ask is that you please stitch one for our Hearts For Hospice program and return to them. All the information to return to Hearts For Hospice are in the instructions. Thank you.

Thank you for stopping by, I hope you have time to stitch today.

ttfn…sue

Mr & Mrs canvas designed by Raymond Crawford

Today is March 30 National Stitching-In Day so what a better way than to talk about my last big needlepoint project. I started this project last spring March 2017 but could not share because it was a present for my grandson and his bride on their first anniversary. I had seen this Raymond Crawford (http://www.raymondcrawford.com/) canvas before they were married and with my new love of beading I knew I would have to bead this project. I would guess it took me six months to completely finish this canvas. Beading needlepoint is a long process and why I chose 18 count when 13 count was available I’ll never know.

First I had to find the right beads and I first purchased 11/0 beads for the project but they were too big so back to square one and size 15/0.


I stitched every bead twice in Basketweave style. Why Basketweave? I did not want to stitch Continental and have the canvas warp; I knew blocking would have been impossible. So I took the extra time to stitch Basketweave beading. I used a double strand of beading thread that I had stretched and waxed. If you don’t stretch your beading thread over time it can become loose and your beads will droop; also strech thread before waxing. I stitched every bead twice to secure each bead in place (see diagram). I also started every letter on the right side so my basketweave was always being stitched into a previously work hole. I did this for two reasons: I wanted all the beads to slant same direction and  I was very careful not to pierce thread from previous row. Here are two or more days of stitching on the &, some days I only got in 10 to 15 beads. Beading is a long arduous process for me;  it was tiring on the eyes and also just a slow, labor intensive process.


When I went to stitch the border I noticed on the left there was one empty thread between the M in Mrs and the start of the border, but on the right the & was right next to the border (no empty thread.) This bothered me so I just decided to I stitched the border one thread further out. It wouldn’t show because I planned on stitching all the background with silk. I also changed the direction of the border stitches at the center of the design area; this allowed me to stitch around the corner without compensation. As I recall, it was not an even count divide , so I always try and make the

odd count to the right of center and/or lower of center. I don’t remember if both counts were off or just the left –right borders (top & bottom)   I used Kreinik #12 braid in 3 colors: 221, 202HL and 102 and the stitch was a Diagonal Gobelin over 2 threads.

I stitched the background last in basketweave with 4 ply Rainbow Gallery Splendor S800.

It seemed like it took me forever to stitch, but I love they way it looks finished. I had a mat made and   framed it myself and it now is safely residing in Michigan.

When I gather up another project I did for my guild I will share the different methods of beading needlepoint with you.

After I finished this project, I thought I would swear off beading forever…but forever is a long long time. 😉

Have a blessed Passover or Happy Easter.

Thank you for stopping by, I hope you have time to stitch today.

ttfn…sue


More on thread organization

Organizing threads is an on-going project…

My SplendoOLYMPUS DIGITAL CAMERAr, Watercolors, and DMC flosses and perles are sorted by number, the rest are mostly by color and then by number. If I found a chart for color families, I have a copy with the threads.  Splendor, Silk & Ivory, Vineyard silks (these are the ones that come to mind) also have color family lists that I think you can find on line at their websites…I keep a copy of these also with the thread.

I also have color cards for many of my threads and these are stored hanging, in my old wooden toy bucket, or in a notebook (these are all my Rainbow Gallery threads).  I need to update these too.


Let me add a note here…I use and store my threads UNCUT, since I do some of my own finishing… I want to be able to pull the threads to use when making twists. I do not cut my Watercolours either but that is a post for another day. ThreadworX (http://threadworx.com/) is one of the few threads I have that are cut; the other two that come to mind are Dimin Epic and Rosebud Studio Felicity’s Garden and that is because they have such great animal fur colors. Epic and Felicity’s Garden are stored by color.

Back to storage…Some of the threads are stored on rings in sweater boxes; these are mostly stored by color, then number on large rings; the exception to this is ThreadworX and they are stored by number.

Another added note: I use the Floss Keys; I got mine from YarnTree (http://yarntree.com/) and Floss Pak bags to store yarns that I have begun to use on these rings.  If the skein or put-up  hasn’t been opened it hangs on the ring as is, but once I go to use it I wind it on a card.: I try to buy threads I know that have changes in their dye lots in pairs, so I will have two skeins of most colors. Once I wind one of these skeins on a floss Key I will store both in a Floss Pak bag. Once one of the skeins is completely or almost completely used I will buy two more hang them on the ring next to floss bag.

I also use the storage boxes I get at Hobby Lobby with my coupons; each box is labeled to the contents. Kreinik, DMC, Trebizond, Kreinik silks, Painter’s threads. Some others that I have limited colors are stored in these boxes too one for cool colors V-B-G and one for warm colors Y-O-R. These threads are stored by company , then by color, then by number;  I usually have less than two dozen of these threads per company…otherwise they would rate a box.  I always keep the label with the thread!  I make a template to store in the lid with number info for all these boxes.

All the DMC floss, #3 and #5 perle are stored in Hobby Lobby boxes. I use floss keys to wind the threads; each is specifically marked and is stored with the labels as well (I wind the thread over the labels.) The Floss Keys are marked not only with the color number on the top right but the type of thread on the top left: i.e. DMC (floss), DMC#3 or DMC#5.


I have some threads hanging on a wall but the sun does not hit them and they are mostly threads I have made samples of myself and some are discontinued or threads I do not use. I would not store threads here I plan to stitch with, there is too much of a chance they would fade or get dusty.


When I started this re-organization, I decided I also needed to update my inventory sheets. I have kept (and I use this term very loosely) a spread sheet of the different threads in my stash for years. I am not very good at remembering to update these files and so as I started the physical re-organization of my threads, I also took the time to update and re list threads in the spread sheets. DMC was the file I had semi kept the best and it was fairly easy to update. Some of the other threads I had listed all their colors even though I only had a partial inventory; so I made a second sheet within the spread sheet for the thread and called it “my threads” and the complete list is “master.” I moved the color info for only the threads I have in inventory to the “my threads” sheet. Now when I go to use threads I will be able to see if I need to fill in families (if info was available).

It took me a while to set up but it keeps me on track. I have been a poor record keeper and so I have some threads that I have kept buying because I was not sure I had them. I have 7 cards of #820 red Splendor; since this is a Christmas red I think several of these are probably from classes I have taken but I probably bought several too. I am from the school when in doubt, buy two. I have a few others of these and I did notice they are all in my comfort palette so I know I have purchased them more than once.

I have promised myself now that I am pretty thread organized both in storage and on paper I am going to keep it up. Will let you know at the end of the year how I feel I did. I have also bought a small loose leaf notebook (5.5×8.5″) that I am going to adapt the spreadsheets to fit, so when I am shopping I have it with me. Probably won’t work as well as I envision but we’ll see.

Storage and record keeping of threads is an ongoing thing and a personal thing. I think you have to look and listen to how others do theirs and then incorporate what works for you. AND then you have to be diligent about using your method.  I have a friend who gives or throws her threads away after every class or piece she stitches…she says it is more trouble and aggravation to remember where the threads are, to get them, and she never has all the right ones. There is too much Scotch blood in me for that…

Now that I have my threads in 85% order…it’s never completely finished, I am starting on all the stitch diagrams and stitch patterns I have collected and want to put in my computer. I know there are a great many stitch books out there and this is just for my benefit, don’t plan on writing a stitch book. But I have lots of stitches I have written down that I think could be developed into quick little designs.

Thank you for stopping by… I hope you find time to stitch today

ttfn…sue

Needed to reorganize


OLYMPUS DIGITAL CAMERA

My office and threads got away from me last year and even though I DO NOT make New Year’s resolutions, I decided reorganization was needed. I spent some time thinking about how I wanted to do this and nothing jumped out at me, so I decided to just jump in and start.

I made some basic decisions: If a thread is discontinued, I was getting rid of them: Good-bye Marlitt; Rainbow Gallery has discontinued threads over the years and I still have them, good-bye discontinued threads.  I had a complete set of JP Coats and I don’t think they make it anymore and if they do, I never used it.  There are two exceptions to this rule: Orange Needle Necessities (now ThreadworX) Overdyed Rachel. ThreadworX does not produce this thread and I love it for carrots and carrot noses so I horded several skeins for my own personal use. And another Needle Necessities thread, an overdyed Madras in blues was perfect for my Peter Rabbit coats; so I horded it too. I have been to the ThreadworX website (http://threadworx.com/) and have noted a few choices to replace these threads. ThreadworX if you are reading this: would love a #5 perle cotton in Trick or Treat orange.

I also decided that if any of my DMC floss or perle cotton was cut I would get rid of it. If I use perle cotton for stitching a Temari ball, it cannot be precut because I use very long lengths when stitching Temari Balls. I did keep my Anchor perle cotton, although I have heard it had been discontinued (Anyone know anything about this?). And I do know that Colonial Needle (http://colonialneedle.com/) carries a full line of Finca floss and perle cotton thread (sizes: 3-5-8-12-16) in a great color range, so I’ll start adding that to my stash. 😉

My old threads are going to a friend who uses odds and end of threads and canvas to stitch hearts for a Hospice Home near her. A heart is placed on a patient’s door after they have passed away. This alerts staff and visitors to be respectful and quiet around this patient’s room. The family is then given the heart when they leave. If there are any threads she doesn’t want she will send them to a prison in Ohio that used them.

So I began. Then I had to decide if after I separated all the threads I was going to sort by number or color. I finally decided on using both and seeing if I prefer one method over the other. All the DMC is stored by number and I will continue to do this since I have a great color card. If I stored a thread by color then within that color I stores in numeric order. Watercolours overdyes I stored by number but others I stored by alpha name. I guess you just have to find a method that works best for YOU.

I also decided to wrap all my threads on large floss winder cards and so I ordered 1000 floss Keys and 200 Floss Pak bags from YarnTree (http://yarntree.com/) so I can start this process. I also purchased some storage containers from Hobby Lobby to store the floss keys. I have begun a slow wrapping process…as I need a new thread I will wrap it on large floss winder cards. I also use these floss winders for any thread that is skeined, even overdyes. This will be an ongoing process; otherwise I will not get anything else accomplished this year.
I finished my reorganization this week-end by labeling all the containers. I feel so accomplished. I have two boxes and a bag for my friend who stitches hearts. I got rid of 4 large sweater boxes from my closet and I still have a closet full of threads! And of course, we all know that when I go to stitch, I will not have all the right threads….Stitcher’s Law. 😉

I don’t know if this is the final reorganization or whether I’ll redo as I go, but it is sure a lot better than it was last year. And I am still looking for an answer to whether Anchor is doing away with their pearl cotton? I would love to hear from you on how you store your threads. Do you store by color by manufacturer, a combination? I think when we share , we learn and that’s what this is all about and having fun stitching of course.

Thank you for stopping by… I hope you find time to stitch today

ttfn…sue

P.S. Someone asked me this week what “ttfn” means.  So for those of you who don’t know it is from Winnie the Pooh; Tigger says it all the time. It means “ta-ta for now” or “ttfn”. Winnie the Pooh books were my favorite growing up and my grandmother used to say this to me. So if Carol Burnett can pull her earlobe for her grandmother, I can ttfn for mine. It just makes me smile and we need to smile and make the world a nicer place.

Nelson Atkins Museum of Art Needlepoint

Hope everyone had a wonderful Thanksgiving. We had 40+ for the holiday so we were very grateful for many things. Now it’s time to get ready for the Christmas holidays. It seems like I’ve done nothing this fall but put up Halloween and take it down; put up Thanksgiving and now I’m taking that down to put up Christmas. I think the older I get time passes quicker and I move slower.

Since I have more than one project going at the same time I have finished some other smaller projects while I was working on the blue bird. I really had to be in the mood to stitch the blue bird and so there were days I did not touch him. I did another big project while I was doing the blue bird…I don’t know why but sometimes I bite off more than I can chew.

KC Needlepoint, our newest needlepoint shop opened in June. (https://sudukc.wordpress.com/2015/06/16/no-stitching-todayjust-making-new-friends/) and they have local landmark painted canvases. And of course, one of them spoke to me right away and I had to have it. I could see it finished but was not sure how to stitch it but had an idea. So over the summer I looked at the canvas, made some decisions on what to do first and started on the canvas.

2015-12-08 KCAG1 unstitchI try to remember to take a picture of the unstitched canvas before I start stitching but I got ahead of myself on this one. I was so excited to stitch it I forgot. But I did get a picture before I had gone too far with my plans.

The other thing I try to do is research my projects if 2015-12-08 KCAG2 researchpossible. By this I mean if it is an actual place like the art gallery or a lighthouse I look them up on Google to see the actual place; this will give you a better sense of the actual colors of the area and the structure. I actually learned something about the shuttlecocks at the art gallery. There are three of them two on one side of the gallery and a third on the other side of the gallery; the gallery building is representing the badminton net (from the artist statement). I’m seldom on one side of the gallery and had not noticed it or did not remember it being there…but I thought it was an interesting bit of trivia…I’ll be good if I’m ever playing Kansas City Jeopardy.

First, I painted over the feathers on the birdie and let dry for several days. I stitched the background like there was no badminton birdie on the lawn leaving the ball of the birdie unstitched. Using one of the pictures I had I cut the birdie out and loosely basted an outline of the feathers. Then I stitched three feathers with Kreinik braid and then this project almost came to a screeching halt.

In my mind I had made three stumpwork feathers and attached them to the canvas. I had gotten some white wired braid and #12 and #16 braid from Kreinik and tried making a feather. My first attempt failed miserably and I decided maybe I should read about making wired stumpwork. Like I said before, sometimes I jump in with both feet and realize I have bitten off more than I can chew.

I kept mulling this idea over and over, and the canvas looked good with the three feathers I had already stitched on the canvas but I could see it with these three dimension feathers too. I knew I would not be happy until I figured it out. I took it to a gathering where a group of stitching friends were going to be and showed it to them. They all liked it just as it was but I told them what I saw…then one of them offered a piece of advice she had learned in a class…use a piece of voile or any light weight fabric to stabilize the stumpwork. Voilà, the light was flickering; I would mull this around and figure out what to do.

2015-12-08 KCAG3 ribbonI was heading for the fabric store when for a piece of voile when my daughter in law suggested voile ribbon (great idea then I will not have to buy 6 inches of fabric); and as a matter of fact we have some in the gift wrapping area of the basement… This turned out to be the lightbulb on moment I had been waiting

OLYMPUS DIGITAL CAMERA

for. The ribbon was perfect.

My next hurdle was all the needleweaving books said you needed to uses one piece of wire for the outside. I have no problem with this but I also wanted a piece down the center for stability. After one miserable failure I just kept playing around until I got what I had envisioned in my mind. I used Kreinik #16 wired braid and #12 braid for weaving. It worked great after I got the hang of what I wanted it to do.

OLYMPUS DIGITAL CAMERA

These are the finished pieces. Yes, I did Stitch a second one for the shop without the neddleweaving but with the same overstitching technique…they’re going to have to use a frame.

OLYMPUS DIGITAL CAMERA

Hope everyone is finding time to stitch this time of year…it is so relaxing .

Thank you for stopping by… I hope you find time to stitch today and all through this holiday week-end.

ttfn…sue

Blue Bird Flowers: Rest of the Flowers

Please keep France in your thoughts and  prayers. Our world needs more peacemakers and less hate mongers.

I’m running a few weeks maybe a month behind in my postings verses my stitching. Most of these flowers were stitched during Major League playoffs and World Series but I can’t write that fast. I don’t know how some of the needlepoint ladies post almost every day…I’m lucky to do one a week. But that’s a whole other story.

2015-18-12 BB o stitch guide

2015-18-12 BB j green flower 1I started the green flowers (#7 Stitch guide above) by stitching all centers first in French Knots with yellow floss. Then around the French Knots I used blue #12 perle to make Cast on Bullion Knots. If you all have been following me for any time you will remember back in February I told you about the new needles I bought

(https://sudukc.wordpress.com/2015/02/08/hari-kuyo-broken-needle-celebration/). They have been lying around my stitching nests

OLYMPUS DIGITAL CAMERA

waiting to be tried. So I decided this was a good area to experiment with these not so new needles. I used the Chenille needles to make these Cast-on Bullions in the green flowers. Cast-on Bullions are different from Bullions Knots: Bullion Knots you just wrap the thread around the needle; with Cast-on Bullions you twist the thread like you were casting on stitches for knitting. Depending on how you do this casting on decides how the Cast-on 2015-18-12 BB d Cast onBullion will look. Casting on the same turn every stitch will make the bullion twist in a corkscrew like manner. Casting on every other turn will give you a more jagged turns. These knots were fun to do but time consuming. Then I filled in the green areas with Woven Plaited Stitch and then more Bullions in white perle. I think these flowers took me the four American 2015-18-12 BB e BullionLeague Games to stitch.


2015-18-12 BB f Cast on 1 2015-18-12 BB g Cast on 2 2015-18-12 BB h Cast on 3 2015-18-12 BB i Cast on 4


2015-18-12 BB k green flower 2The other green flower on the wing was French Knots and the Woven Plait …the Bullions had done me in by then. This flower was stitched with Kreinik green and Confetti pink, perle cotton and floss.


OLYMPUS DIGITAL CAMERA

Another night I stitched the large yellow flowers on a wing and small side piece. I used yellow silk ribbon again to stitch French knots on stick for the petals and then filled these in with either White perle (small side) or Confetti pink French knots and embellished both with pink beads on the white and green beds on the pink.


2015-18-12 BB m spider webAnd then I was down to the three small yellow flowers. I had cut too long a yellow ribbon and so I decided to make spider web flowers with
yellow and pink silk ribbon. I made the base out of perle. These were fun to stitch while
watching the Word Series.
Finally I was done with the flowers but still needed to go back and fill in blue areas around flowers with more basketweave. Next week is Thanksgiving and we will finish up the Melissa Shirley Blue Stitching Bird…

Thank you for stopping by… I hope you find time to stitch today

ttfn…sue

Blue Bird Flowers: More Flowers

I am really not liking these flowers now. I think it is because I am ready to move on to other stitching and the blue bird has a bunch more stitching before it is ready for the finishers.

I was working on a piece at a time but that seems kind of counterproductive. I don’t seem to get into a rhythm, so I’ve sorta decided to work by color and get these flowers stitched.

2015-11-12 BB aThe pink stitches were first in this new method; there was just a single pink flower  (#4) on the large side piece. I stitched the green area in a woven stitch using #4
Kreinik Braid. Truthfully, this is a green no longer being produced, but I think this is an excellent way to use your stash and should I run out of #4 I’m sure I also have a spool of #8 2015-11-12 BB b pinkbraid and who but me is going to notice. In fact if you look at the pictures, the magenta Kreinik I used is Confetti Pink 042 and I believe this is one of the colors Kreinik is phasing out. I happen to love it and have it in every size so if I ran out I used another size. I have even been known to twist ribbon in the needle to use as braid.

But back to the flowers…The border is a Freeform Satin using Neon Rays, so I had to lay the Neon Rays. But the center is my favorite. I love to do French Knots and so both the white and read areas are stitched in French Knots. I used the Confetti Pink 042 first and covered most of the area, then added a few white perle French Knots around the edges.
2015-11-12 BB d redThere are four red flowers: 2 large (#6: one on the wing and one on the large side piece) and 2 small red flowers (#5: one on the large side piece and one on a wing) I’m not wild about all the white around the flowers (see stitch placement picture) so sometimes I just stitch over these areas with the petal color. The small red flower is stitched using all French Knots (yes I am on a roll). I stitched from the center out with yellow floss, Kreinik Confetti Pink 042, and white perle; then added beads.

2015-11-12 BB c redAnd since I am on the French knot making roll, why stop? I decided that since I was not found of doing satin stitch, French Knots on a Stick would do nicely for the petals of the red flowers. In case you hadn’t noticed all the red flowers are really Confetti Pink, and guess what the Needlepoint Police have not shown up at my door yet…and if they do I’m not answering the door!  And yes the centers are filled with more French Knots using green Kreinik, yellow floss and pink beads.

Can you tell I’m losing interest in this piece? I’ll be back next week to finish up the flowers…I am bound and determined to be done with this piece by Thanksgiving…I have too many other canvases to stitch….not to mention the original ideas floating around in my head.

Thank you for stopping by… I hope you find time to stitch today

ttfn…sue

My Stitching bird.

OLYMPUS DIGITAL CAMERA

I usually set the next un-stitched canvas I want to stitch out on stretcher bars so I can look at it as I finish stitching the last one. This usually gives me incentive to finish a canvas and not dawdle; but sometimes (usually) I get ahead of myself and stick the new canvas audition out to soon and it frustrates me that the canvas I am working on is stitching so slowly.

This is one of those pieces that had many side stories to it, or maybe it is just insight into my crazy thinking. At any rate, I will try and explain as we go…I am going to walk you through MY processing. It takes some turns and twists…so let’s get started. This canvas is painted on three separate pieces of canvas for easy of handling; so I have three canvases framed up and I am going to start the bird’s bodies first.

2015-08-05 MS Bird tear sheetThis Melissa Shirley (http://melissashirleydesigns.com//) canvas is another guild member’s canvas (Remember if you like this canvas ask your shop to see if the canvas is still available.)  She loved birds and stitched many of them…I have a couple turkeys she stitched but this was one that spoke to me, so I brought it home. I knew I wanted all the squares to be the same stitch: middle blue square are Reversing Scotch, lightest blue squares are Milanese; and dark blue squares are Byzantine.  The yellow bars are Slanted Gobelin and the little squares would be Smyrna Crosses. I had even decided to stitch the bird in Brown Paper Packages’ Silk n Ivory (http://www.brownpaperpackages.com/).

(1st twist). Yes, I know some stitchers think Silk & Ivory pills on 18 count canvas and it may; but I have never had this problem. I think if you are stitching something that is going to get a lot of wear (belts, purses, etc.); Yes, then you should think about using another thread. But remember any thread on a wearable garment will wear: perle cotton will lose its luster as will silk pearls, floss will not hold up to constant wear, and wool will pill too. So in my opinion, you should use what you like. Wearable stitching is not for a lifetime in most cases. Using Silk and Ivory on 18 count ornaments, standups and other decorative pieces works for me and I use it. The only problem I have ever encountered over the years is that large area of Silk and Ivory stitched in Basketweave tend to be tight (but I did it on this piece as you will see), but I have very little or no problem with decorative stitches. I do us a size 22 needle when stitching with Silk and Ivory, I think the larger needle opens the wholes of the canvas a tad more and helps the thread move smoothly through the canvas.

So I had pulled my threads (I originally intended to do the entire bird in Silk and Ivory and had pulled all the threads. Good thing I have my stash at hand…because the best plans usually change.)

2015-08-05 MS Blue Bird square counts usedI don’t know why I picked a center square to start must have been Stitching Angel intervention, but somewhere I got it in my head these were not perfect squares. They are 16 threads to each square separated by 3 threads. But I made a mistake and stitched the Reversing Scotch Stitches over three threads instead of four. I could have taken it out but 2015-08-05 MS Blue Bird scotch squarefor whatever reason (I hate Frog stitching) I kept going.  I assumed the squares were off, but if I added a fourth thread to the dividers I could continue…I later went back and charted the Reversing Scotch and I liked my mistake better, so I kept it. After I played around and decided this mistake would work there was another twist: I have decided to change some of 2015-08-05 MS Bird rev scotch used 2the threads.

2nd twist: I have a list from Kreinik (http://www.kreinik.com/) of the threads they are no longer stocking (some you can request others have been discontinued) and I had spent a day separating these out so I would not use them for designing. I had lots of 042 Confetti fuchsia; I had used it to teach a class years ago when I was in certification for teaching. I use discontinued threads only in pieces for my personal use. So I decided to take yet another twist…

2015-08-05 MS Blue Bird copic marker3rd twist: A few years ago I discovered Copic pens (http://www.copiccolor.com and http://www.copiccolor.com/) and now I can’t get enough of them. While playing with the Copic pens and an air gun I realized I could color areas of white canvas to simulate any color canvas I could want to purchase…hummm…but that’s another story. But I have used them to color canvas backgrounds if I need a larger or different shaped background.  I wonder if I can change the color too?  So I stopped stitching and changed all the yellow to sorta pink so I could use the Kreinik Confetti Fuchsia.

So now I am back on track, well at least my track. I am stitching the blue squares and looking at the wings and sides too

2015-08-05 MS Blue Bird chin aAnother turn came (not really a twist but a stitchers/finishers decision) when I went to stitch under the beak. Since I have been doing some of my own finishing I am more aware of these sharp, small turns that do not finish well. So here, under the beak I made another stitchers choice. See that one stitch that is unpainted, it went away; not the finishing there will 2015-08-05 MS Blue Bird chin bbe easier. As you are stitching and you see this little opps, you can cover them with a stitch and finishing will be much easier

So for now I am stitching along on the blue bird bodies…I will be back with the sides and wings soon. .

Thank you for stopping by… I hope you find time to stitch today!  ttfn… sue

Stitching updates

15-02-24 temari aSorry about last week but the week got away from me and before I knew it this week is almost halfway over too.

15-02-24 temari bI have been trying to finish up a heart and move on to St Pat and Easter and poor Mardi Gras just blew by like a cold breeze (hummm it was cold.)  But I did make two Temari for the occasion,  just didn’t get them posted.  Used Kreinik blending filament in purple gold and green togive color to base of ball and stitched with #5 DMC Perle in Green Gold and 15-02-24 temari cPurple and a Kreinik braid. Simple 6 division but the Obi bands are different.

My creative juices are keeping me awake; I even got up one night to stitch…What can I say…didn’t have a pencil and I was awake so it seemed logical to me. I don’t think dog and DH had the same thoughts… and 15-02-24 heartsall I did was play with the Kreinik wire braid for a few minutes, okay maybe 30 but in an eight to ten hour night that’s only a few minutes. Didn’t even stitch it down during that time…and the light was only on my stitching.

15-02-24 stitches aAnd then Jane at Chilly Hollow (http://chillyhollownp.blogspot.com/2015/02/lets-make-ribbon-flower.html)  posted this new type of knot that was taught at TNNA winter show (https://www.facebook.com/video.php?v=656298941158846&set=o.108537025890131&type=2&theater ) and I had to try it, seemed perfect for this design. Colonial Knot, French Knot and Ruching. Plus the flowers are another decision I haven’t decided on yet either: Ribbon flowers, beads…decisions decisions!?!?!?!?!

15-02-24 stitches bAnd before I stitched the leaves on the heart I wanted to play with stitching picots. Needed to decide whether I wanted to use wired braid or just braid; whether I wanted two, three or four legged picots;  would one work better than another and did I want more than one style? You get the idea questions, questions and more questions.

But last week I did get this playing accomplished and this week I am really putting effort into finishing up the heart. Should get some great stitching time in as it is supposed to be cold, cold, cold and only have only a couple outings planned.

Thank you for stopping by to visit, I hope you find time to stitch today or do whatever helps you be creative!

ttfn…sue

Finished Lighthouse on National Lighthouse Day

I’m still on dogie-watch schedule; I can’t seem to get back in the grove of things.

14-08-07 desk beforeMary Corbet (http://www.needlenthread.com/2014/08/embroidery-work-space-or-where-is-waldo.html) and I have something in common this week…I came back to a desk piled high with things that needed attention and all I wanted to do was stitch and let the dogs out. But I did tackle my desk and made a dent to put some order into my desk; now instead of a heap of mess, I have organized piles of mess.

OLYMPUS DIGITAL CAMERA

But since I finished stitching my first light house and Vicki De Angelis over at Mostly Needlepoint (http://mostlyneedlepoint.com/did-you-know/) pointed out it was National Lighthouse Day…I figured it was an omen and I should share this with everyone today.

OLYMPUS DIGITAL CAMERA

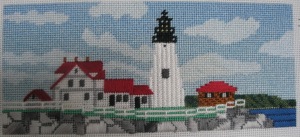
My first lighthouse from ABS designs (http://www.absdesignsonline.com/)is Portland Head Lighthouse and is destined for Sudberry’s (http://www.sudberry.com/) black box. My box is like the one shown on Anne’s website (I think it was called the pen box) but I think it is out of stock and unless you find it in a shop somewhere, you may have to frame this piece.  I needleblended the sky (post: https://sudukc.wordpress.com/2014/07/30/hiding-out-is-such-fun/) and will share with you my email from Anne, MNS (master of Needleblended skies):

You’d think that counting the number of threads in the depth of your sky, then dividing it by the number of “blends” you’ll be using, would give you the right number of lines deep for each “blend.”  But every time you cut in a new “blend,” it encroaches on the one before it.  So….

 Try turning the canvas upside down, working the lightest value of blue at the horizon.  Keep going until you run out of “blends.”  In the case of the box insert, you then have the option of going to DMC 3755 to cut into the 3325, so the darkest shade is at the top of the canvas.  That makes for a more dramatic effect, and the lightest shade at the horizon doesn’t overpower the shades above.

That makes sense to me…I started at the top and worked down but next time I’ll work up from the horizon line.

This was one of those pieces that no matter how hard I tried to place more decorative stitches, my friend Virginia’s words kept rattling around in my head. Virginia is a guild member, who has tried more techniques than anyone I know; she stitches till the wee hours of the morning and until recently (last year or two) stitched on 40 count canvas without extra light or magnification. Oh yes, and did I tell you she is 80+ years young. I always say Virginia has forgotten more than I am ever going to learn. Anyway one time, I was trying very hard to put decorative stitches on a canvas and it was not working out at all. Virginia said; “Honey, when it’s screaming Basketweave, just stitch Basketweave. Sometimes Basketweave is best and every needlepoint should have some…it’s a place to rest your eyes. ”

Well, every time I would try to think of a different stitch I would hear Virginia, “Basketweave” So much of this piece has Basketweave. The sky is Basketweave, but I did get to play around with the needleblending technique. And after I was completely finished with the sky I thought I could have used Nobuko or Diagonal Mosaic for the clouds…but I was lucky to get the clouds in there anyway. And I love the rocks, Alternating Padded Satin with overdyed threads just jumped off the canvas. And the Diagonal Gobelin for the water was good too. The foreground green and shoreline could be nothing else but Continental and Basketweave.

The buildings: I tried my best to stitch the siding of the large building in a small decorative stitch but nothing seemed to work for me…Okay Virginia, Basketweave it is. I did get the windows and doors stitched in Cashmere and variations of Cashmere. The brown building did lend itself to a decorative stitch and so the siding is worked in Diagonal Mosaic, the shutters are Oblong cross, and yes, the windows are basketweave. And all the red roofs are a Gobelin stitched diagonally, horizontally or vertically.

The green background I couldn’t decide whether that was grass or trees and I wanted it to be trees, but they had to stay on the back. I used 2 ply green overdyed floss and did French Knots. They were small enough that they did not overpower the little brown house but added a texture to the right side of the canvas to help balance the decorative stitches used in the rock.

The lighthouse did give me pause…I thought since it was behind the main house it should be Basketweave too, but then I decided that lighthouses are round and so this was probably a bit further behind the house than I originally thought and maybe if I did Alternating Diagonal Gobelins it would make the light house the focal point (as it should be) and still not overpower the house  or the whole canvas. It worked, gave the lighthouse a bit of definition and the illusion of roundness yet stayed behind the house. The top is mostly Continental stitched in black perle cotton and Kreinik black braid with the lights in yellow Kreinik braid cross stitches.

But my favorite is the fence, I was afraid it might get lost against the white house but it didn’t (even if the picture doesn’t show this. I wanted to stitch the fence in a whiter white but could not find DMC B5200 in & 8 perle and did not want to use floss. I stitched small horizontal  (2 threads x 1 thread) Overlapping Oblong Crosses for the rails and then when I had cleared the area for a post I went back and stitch an upright Oblong Cross (4 threads x 1 thread)…see diagram.

14-08-07 overlapping oblong cross

My first lighthouse is completed and as much as I would like to keep stitching new canvases I have a box full of canvases I need to stitch so I have decided one PPC (previously purchased canvas) before new canvases. And I haven’t decided what that will be yet…but I have to find a small one for my carry along project.

In a couple days I’ll show you how much progress I made on my Debbie Stiehler Tomato too. I really did get some serious stitching done last week. BUT I have to get back to my finishing…Christmas is a coming!

Thank you for stopping by, I hope you have time to stitch today!

ttfn…sue