Hearts

I haven’t been ignoring my blog but I have been busy designing needlepoint hearts and making beaded butterflies. But, I have been remiss in writing about my guild’s philanthropic project, Hearts For Hospice.

Guild members (really anyone who wants to help on this project, you do not have to be a guild member) stitch hearts; Sue and her 12 year old Grandson, Jon, make the twists (DMC #3 perle) to finish the hearts, Georgia and Sara (and sometimes we have a finishing day) finish these hearts at no cost and the hearts are donated to three (3) local Hospice Houses, one is a children’s home.

Maybe you saw the article in ANG NeedlePointers, Jan/Feb 2019 and May 2017; Needlepoint Now, January/February 2019, and on Facebook.

It all began when our friend Georgia went over to “The Home” at her retirement community to volunteer. They asked her if she had received her flu shot and of course she had not (doesn’t like them or maybe they don’t like her…can’t remember), so she could not volunteer. A staff member saw hearts Georgia was stitching and inquired about them and asked if she could make more.  Knowing she could stitch a heart, she returned home and started making hearts and that’s how it began…one heart at a time.

Within the month she had convinced several of her friends to join her and soon it became a project and another friend, Sue Hart organized us into a philanthropic group and offered the project to our guild as an ongoing philanthropic project.

Side note: did you know that all non-for-profit organizations need a philanthropic program to qualify as a 501(3)(c)? I didn’t but it makes sense if you are a non-for-profit organization that you would do something. I know our national bylaws state that our purpose is to teach, promote and preserve the art of needlepoint but I did not know you need to have an ongoing philanthropic project.

We have encouraged members to just try a stitch and variations. These hearts make great doodle canvases. Then if you take a picture of it you will have a permanent copy and a family will receive a lovely remembrance. We have also encouraged needlepointers to take the painted canvas they thought they couldn’t live without, but have now become less likely to finish and make a heart(s) out of the painted canvas. There are two hearts from a painted canvas in this picture.

Barbara Richardson; a friend of GKCNG members and past president of ANG adapted her heart design for us to use. We use it to teach groups of needlepointers how to start and some first time needlepointers. We even have a class that shows you how to finish these hearts.


Several months ago Colour Complements: https://colourcomplements.com/ embroidery threads sent me samples to hand out to guild members I had several left over and so I stitched hearts with  them and sent pictures to Colour Complements. The owner contacted me and I have designed a couple hearts for her use (soon to appear on her website, I think).


This summer, one of the bead groups I belong to posted a beaded butterfly and I stitched those for some hearts. I asked permission of the designer, Patricia Parker to stitch them for other hearts and she gladly gave her permission. So guild members that request butterflies for their hearts will get one and I have made several for the two finishers to use at their discretion.

We (I use this term loosely, because I am but a small part of this endeavor) have been doing this for the last four years and have completed over 1400 hearts. We have received hearts from 26 states and 2 countries. There are at least three other guilds that we know about who have started their own program.

If you or your guild would like the information, contact Sue Hart at Heartsforhospicegkcng@gmail.com

If you have any #5 or #3 perle cotton or #12-16 Kreinik Braid (Ribbons work too), or any thread suitable for cording laying around, it needs to be skeins not cut. And you don’t know what to do with it , Hearts For Hospice would be happy to use it. Just contact me or Sue Hart.

I have designed another heart in two colorways for our Hearts For Hospice program and I will PDF you the instructions for free These hearts used Colour Complements Overdye, DMC #5 perle cotton, and Kreinik #12 braid but any of your stash will work. All I ask is that you please stitch one for our Hearts For Hospice program and return to them. All the information to return to Hearts For Hospice are in the instructions. Thank you.

Thank you for stopping by, I hope you have time to stitch today.

ttfn…sue

Class Instructions, Stitch Guides for Canvas & Charted Counted Stitch Guides.

Editor’s Note: If you do not like soap box stands do not read this post.

At some point in your creative endeavors you are going to receive written instructions of some sort; from a teacher, friend or instructor. They can be free as in a hand drawn on a piece of paper or instructions you pay for, a complete set of written instructions for a class or a canvas, etc. Some instructions, like Counted thread can be as simple as a set of diagrams or as complex as complete, step by step instructions.

All the above are not equal, some instructions are better written than others, some will have mistakes but the one thing they all have in common is that they are COPYRIGHT protected.

Simple put, this means you should only use them for yourself! You should not sell them, give them away, share them and any form…this means no copies, nor hand drawn copies of someone else’s work!

When you have finished the project or class, dispose of them properly. Keep them all or in part as a reference for yourself; or throw them away. You purchased these instructions for your use not for other people. You paid for the instructions, is your friend paying you?…still illegal!

When you pay for instructions, you are paying for that person’s creativity. You are paying the shop to keep the lights on and to carry the things you like to stitch. You are paying for a lot of little things that keep designers designing and shops selling.

At the worst ….Would you like to be robbed; because that is what you are doing? You are taking livelihood away from the designer. I know designers/teachers whose stitch guides and instructions are a main part of their income; it is not a hobby or sideline.

How would you feel if you stitched a canvas, gave it to a friend and less than a month later your gift was for sale online, at a yard or at your local resell shop? That’s a similar feeling designers, teachers and shop owners feel when they see these things for resale.

I mentioned a couple blogs ago that I am working on a sale for my guild…I will not accept (and I will throw away) any instructions from classes that have been taken by guild members that do not have the complete kit or stitch guides for canvases that do not have an accompanying canvas. I personally have a problem with class teaching pieces , just because of all the little things you learn in class that may or may not be covered in the text. The “pearls of wisdom” the teacher shares with the class. I know that my Contemporary Forrest Necklace (last post) ttps://sudukc.wordpress.com/2018/03/01/5462/ would have been a bit easier had I physically been in the class with Catherine Jordan.

I would really like not to accept anything but books, but I know that is pushing the envelope for a non profit.

Just be mindful of Copyright and please do not sell something you have already had the creative use of…And if you would like to read more; Ruth Schmuff’s blog offers a designers point of view: https://bedeckedandbeadazzled.com/2018/02/copyright-2/

Putting my soap box away for now. Thank you for stopping by, I hope you have time to stitch today.


ttfn…sue

Melissa Shirley Wicked: final thought

See what happens when I get busy or distracted. I had been writing this post for the week of May 15-20 and I got distracted or sidetracked and now here it is almost Memorial week-end and I am just coming up for air. So here is the final thoughts on Wicked…

After the stitching is completed then the piece has to be finished. I know I have been showing how to finish needlepoint but last year I was not up to the task of finishing. That’s my story and I’m sticking to it…Seriously, I can do ornaments and some other little stuff but really haven’t had the time to try the biggies. One day I am going to try a pillow and a purse but for now I’m going to send big pieces to the finisher. I can’t even find time to sew a button on, let alone make a blouse or finish big needlepoint or for that matter any needlepoint.


I knew where I wanted to hang “Wicked” and how I wanted it finished. I drew a picture for the finisher and once the material was purchased I sent it to her to do her magic.  I was very pleased with the way it was finished and I love to see it hanging at Halloween.

To some people finishing a piece of needlepoint is easy; they take it to a trusted shop and have it finished. Not me, I agonize over finishing. As I am stitching I can see the finished piece, I get these pre-conceived images in my head and then I feel like I need to look for the material to finish the project. Nice for me I know the finisher and I can as her if my idea will work. If she says yes, then I’m off to look for material.


Now, let me give you the advice I seldom ever follow but every finisher I know will tell you is the truth.

You should buy the fabric for finishing before you ever start stitching.

I know, seems illogical to me too, but remember we are limited by out thread choices and the fabrics we choose to  finish our pieces are limited by their color choices. Now I will admit if you go to Hamilton Mo or any large quilt shop, you should be able to find a fabric. But what if you want a velvet or moiré for that Christmas stocking you are spending hours stitching? There is a world of difference between DMC 666 red and DMC 321 or 498 red. And fabrics only come in certain colors. And yes, you could use green for the backing and lining, but there are different greens too. So, if you want as perfect a match as you can get; sometimes it is important to buy that fabric first.

And while we are talking “you buy the fabric”; remember that if you want self-cording you need extra fabric. Self-cording is cut on the bias of the fabric and will require more fabric. Just as local needlepoint shop or finisher how much fabric you will need to finish your piece.


And some shops stock fabrics for finishing, so ask before you head all over the countryside looking for that perfect fabric. Some finishers have fabrics stockpiled and if you ask the shop you use, they probably can tell you which red would be best on that stocking or they can ask the finisher for you.


I’m lucky we have several very nice fabric shops in the area. Sarah’s in Lawrence (http://www.sarahsfabrics.com/), and several quilt shops in the area, plus Hamilton, Mo (https://www.missouriquiltco.com/). I’ve been to Hamilton twice now and while it is both eye candy for the imagination it can be overwhelming also. Hamilton is quilt town in northern Missouri, aka Missouri Quilt Co; Google it or read my post from last year…


A word about finishers… Have you ever wondered why so many shops guard their finisher’s name so closely? The real reason is that they are not trying to keep her a national secret, they are trying to protect her from the thousand calls she would get during busy times of the year asking, “Is my ornament finished yet?” And that is why finishing deadlines are so early. I think a finisher told me one time she finish over 1000 ornaments for Christmas and that didn’t count the stockings. Keep in mind blocking boards can only hold so much and sometimes pieces need to be blocked more than once and sometimes needlepoint even needs to be cleaned before blocking may begin. (This is another blog…but stitching in the hand vs stitching on a frame does have its drawbacks as well as its advantages…I will put this on my list of things to write about.)


Back to “Wicked”… I found the fabric and Batik at Hamilton and bought it. Brought it home and took it to the shop for my finisher to pick up (No, just because I know her doesn’t mean I don’t have to take it to the shop. My finisher will not accept pieces except through the shops she does finishing.) I took the piece about mid-May and I got it back about mid-August.


What took so long? Mine was not the only finishing in line. Mine had to be blocked, just like the rest and maybe twice I didn’t ask; and it’s a pretty big piece so it took up some real-estate on the blocking board. Mine also only had the green material supplied, so my finisher had to get the black for the inset, thread and even the interfacing. I could have purchased the black but I didn’t think about it at the time and she suggested this after she saw the piece…that’s another reason you use a finisher…She’s seen enough pieces to know what looks best even when you limit her by you pre-conceived finishing. And I had no idea what interfacing she would recommend. So see, Finishers do more than finish; they make your needlepoint look just like you want, and they know from experience what works best.

When “Wicked” returned home, it was just what I envisioned and more. I hung it and hated to see Halloween come to an end. I sometimes think I stitch long hours for a piece that only is displayed for a short time but I like it and it brings a smile to my face. And I hope it will be around for many years to come, maybe even one of my Grandchildren will want it when I am gone. Sometimes I get it out in it’s protective bag, and hand it on the door of my office just to look at it…it makes me smile.

Oh and before I forget; what do I do with the stitch guide after I complete stitching the canvas? I destroy it; it is a copyrighted piece of work.  And in my opinion, stitch guides should not be bought or sold without the purchase of the canvas! I have done two or three stitch guides for canvases and I will not sell them to individuals only to shops where I assume the canvas is purchased.

I know a stitcher who saves her stitch guides as a reference and that’s fine but I don’t want all the extra paper. I might make a note in my computer or my stitch notebooks I keep about a technique, stitch pattern or stitch but my stitch guide goes to the trash. I do not share it with my stitch friend who bought the canvas only because she liked mine. I destroy it. Enough said…my soap box stand for the week.

On another note…my family is having a garage sale…no needlepoint but I do have needlepoint books I have accumulated over the years. I will list them here next week with cost and then I will put them on Needlepoint Nation Stash after that.

Thank you for stopping by, I hope you have time to stitch today and over the holiday week-end. AND please don’t forget to honor those you know who are serving or have served in our military. Without these brave men and women we would not enjoy the freedoms we take for granted.

ttfn…sue

Melissa Shirley Wicked: Embellishing

Over the week-end went to a bead show, bought some beads for projects (like I need more projects), but like I say want has nothing to do with need., so I indulged myself. Funny thing is when I got home I remembered I had purchased a bead project last year. But do you think I have found where I put that project? A blog all of its own! I’ve looked a few places but still haven’t found it, but it will turn up…maybe much later. Anyway had a good time at the Bead-Blast.; look forward to next year.

Also went to out 1st art fair of the year. Brookside annual art Fair was this week-end (http://www.brooksidekc.org/art-annual) 32 years and I bet I have been to most. It is just a fun way to spend the afternoon or evening. There is always something to see and I usually come home with something too. This year I did not get anything but the art was very inspiring and my two favorites were Gwen Bennett’s Feather Art (http://gwenfeathers.com/)…these were beautiful. And after I got home and read about her art was even more impressed. And my other favorite was Julie Powell Beading (https://www.juliepowelldesigns.com/)…I will never be this good. Two reasons: My first love is needlepoint and I just don’t have the time or patience.

But it was a beutiful week-end (no rain) and we had fun.

I left most of the attachments, bullion knots and all the beading to the very end, I didn’t want to take the chance I would catch other threads on them and either snag the thread or worse still pull the embellishment or bead out of whack.

I have several Bullion knot needles I got from needlework shop. Colonial Needle distributes them and I blogged about them a couple times (https://sudukc.wordpress.com/2015/02/08/hari-kuyo-broken-needle-celebration/ ) or (https://sudukc.wordpress.com/category/needlework-tools/needles-needlework-tools/bullion-needle/). These needles are a size 20 and so they make a pretty good sized Bullion Knot.

I started with the Letter “K”. I decided the Bullion Needles were too large for the curly-q on top of the pumpkin and the bird’s feet, I used a #24 Tapestry needle. I stitched the curly-q before I stitched the birds feet; it is a very long bullion and I gave it a twist or loop.  After curly-q I added the bird’s feet, more Bullion Knots that I stitched over and around the green curly-q, still using the #24 needle. I left the curly-q above the bird’s wing and the wing to apply later.

I stitched the red veins for the eyeball in Bullion knots using the long Bullion needles I stitched these into a center whole that I had enlarged with and awl (or larger Tapestry needle) to accommodate the eyeball I would attach later. Notice these veins go over the outline of the letter

Next Letter “C” and the legs of the spider. I used a #24 needle here too as I wanted the legs to be small.

And finally the Letter “I”, this had almost the whole top half of the letter unstitched. Using a Bullion needle I made a short Bullion for the top of the pumpkin at the bottom of the “I”. Then I made Bullions using the Bullion needles and made them looser than normal so they looked like curls. I made some at the top of her head too and these I made tighter so the brim of the hat could lay over them.

Then it came time to tackle the hat and flower on the Letter “I”. The hat was a padded ultra-suede applique with beading. I decided to applique the hat and only to tack the brim at the left side outside the letter and the right side on the tip also. The right side is also held in place by the flower. Next I did the ruched petals of the flowers using a flat braid thread and pulling one of the plies.  I left the hat beading and center of flower until I was finished with all the letters.

Two of the areas had a memory wire thread applied to the canvas; the pumpkin in the “W” and above the bird in the “K”.  Memory wire thread is a thread with a fine wire hidden within it; some wires the wire is like one of the plies and other wire threads are wrapped wire with thread. I don’t know that one is any better than another, this was the first time I had used them. My only experience with wire before had been to use in finishing to make an ornament bend, so it looked like ribbon candy.  First I cut two 3-4″ pieces of the memory wire, then I wrapped them tightly around a small knitting needle. I could have used the Bullion needle, a #18 or 20 Tapestry needle, or even the end of a laying tool; just anything that would coil the wire. On one end, I pulled enough back out straight to tie an Overhand Knot close to the coiled thread at one end; I also placed a small drop of Fray Check on the end to keep it from coming loose. I threaded a #26 needle with 1 ply of matching floss (you could use matching sewing thread) to secure the wire in place on the front of the canvas as well as to secure the tail to the back of the canvas.

To place the wire on the pumpkin on the “W” and above the bird on the “K” I used an #18-20 needle or laying tool.  I opened a space in the canvas to plunge the open end of one of the wired threads to the back of the canvas. I pulled the wire to the desired length and secured with at least one couching stitch on the front; then I turned the canvas over, left about an inch and half, cut excess and tacked the remainder securely to back of canvas.

Beading: There were two types of beads on this canvas; regular size 11 or 15 seed beads and then glass eyes on long pins. Go to Etsy and search for glass eye beads on a long pin, they come in all sizes and colors. Here’s one place: https://www.etsy.com/shop/TheWoolenWagon?ref=l2-shopheader-name. I’m sure you could find even the one used for the eyeball in letter “K”; I had smaller green one for the cat’s eye in letter “W”, larger green pair for the witch in letter “I” and amber ones for a bat in letter “D” and a solid black one for the bird in letter “K”.  These all came in the thread kit, so I don’t know the sizes. You were to place these in the proper place through the front of the canvas, with needle nose pliers bend the wire down into place and the secure with thread on the back. Since I had never done this before I was a bit apprehensive…I didn’t want to get into the wrong place on the front, break a pin bending it on the back, or after I secured to back finding the bead looked wrongly placed on the canvas. You guessed it, I left these until I could do nothing else.

I first did all the stars on the letters, then the bat eyes on letter “D”, and the skull on the witch’s dress on letter “I”. For the stars, bat eyes and skull I used the double thread, lasso method. I referred to the unstitched pictures of the canvas for placement of the stars; I did move a star to the nearest over one stitch of the Nobuko so I did not disturb the over 3 stitches. The other beading was on the letter “I” were the center of the flower, and it was just piling beads up to make a center. Then there were the beads on the hat, they were supposed to be Peyote stitched but at that time I did not know how to Peyote stitch (I just learned last week); so I just strung five beads by row and stitched them on the hat.


And then I attached the wing of the bird. I attached it at the top, poked the wires through the canvas ,  bent the wired down and secure with thread to stitching on the back. Then on the front I bent just a bit to give the curve of the wing.


When there was nothing left but the glass eye beads I tackled them I started with the cat in letter “W” because I figured if I broke this bead I could use a metallic braid and make a French knot. Then I did the bat in letter “D” and the black eye in the bird of letter “K”, same thinking here. By know I was pretty sure I could do this and so I did the witch’s eyes letter I and then the big eyeball in letter “K”. They all turned out well, the big eyeball has a tendency to flop but I’m the only one it seems to bother.


And “Wicked” was stitched!

Thank you for stopping by, I hope you have time to stitch today.

ttfn…sue

Melissa Shirley “Wicked”: Background & Letters

The first thing I did before stitching was to read the stitch guide and refer to the canvas. I wanted to be sure I understood everything before I began stitching. As I read I found several things I thought I might have to change but I didn’t make any notes and kept an open mind. I did make notes on things I wanted to remember to do.

Letter W

W: I outlined the areas that the stitch guide noted would be outlined. I even made a little asterisk mark at the points of the moon to begin and/or end the outlines here for a crisp point.

Fangs: I also marked those two stitches on the cat that looked out of place…it took me awhile but after looking at them quite a while I decided they were fangs and not mis-painted canvas.

Curly q on pumpkin: stitch guide said to stitch over this area.

Letter I:

I:  Only the top part of the I was Nobuko stitched. I showed the outline around the letter Nobuko was stitched over petals of flower on hat and over hair. Only the center of the flower was left not stitched in Nobuko.

Also made note that skull was last thing on this letter to be stitched.

Letter C:

C: was the easiest letter to stitch; everything was stitched and the spider web was to be couched over these stitches later. The letter was also outlined.

Letter K:

Outlined again and the eyeball and the green curly q (I would have missed had it not be mentioned in the stitch guide…colors were too close)

Letter E:

Outline letter. The steam is stitched over and noticed a mis-painted area in the E

Letter D:

Outline letter. Another straight forward letter, bats are either Diagonal Gobelin or Basketweave.


Then I began stitching. Like I said before I was happy that the boring part was being stitched first…not boring but mundane.  I always try to stitch some of the background as I go because if you leave it until last it seems like it takes forever! I think it has to do with all the creative stitches have been completed and in your mind you may already be thinking about that next canvas you are going to stitch. Backgrounds can be sooooo mundane and sometimes because of this you will make a mistake and if the background comes around to meet itself it can be off and depending on where it meets can be disastrous. Sometimes if you catch it you can fudge the background and get it to work but if there is a definite horizontal and vertical line it can be difficult.

Background: This background had its challenges. I decided to center each area of the yellow and orange backgrounds because there was the black bar between them.  The orange background was the negative stitches of the yellow background, so I wanted the horizontal lines to match up but the vertical lines did not necessarily have to be continuous. The black divider between them would soften this difference. BUT I thought maybe the Black crosses could look off if they weren’t at least somewhat the same. So if you look at the W-I picture you will see a 1 by the third from left black divider; it is the only one that mostly goes from top to bottom.  I stitched that one first so the others I could sort of match up to this one when other stitching interrupted the line and the crosses would not be more than a thread off to the eye. I don’t think anyone would have ever noticed but me but I guess that is the …”it might be looked at by a needlework judge”. She will spot the off-ness anyway but at least I tried. And you know what a friend of mine says….

“If you are close enough to my needlepoint to see the mistake, you may be too close.”

Background stitching:  I started in the middle of each section and worked toward the side that would give me a full, top to bottom row. Mostly every letter allowed at least one darning stitch to go from bottom to top and this kept the pattern in line. Also once the vertical line from top to bottom in the first section was established; it also started the horizontal lines across the top and bottom. And once the horizontal and vertical line was established in the yellow areas all the oval places in the picture will be the same stitch in each area. The same is true for the rectangle in the orange areas too. This will help keep the background from going askew before I am finished. Stitching the background around this letter was relatively simple as I either had the Nobuko stitches to turn around or areas that were to be padded, each letter was different.

Letter W: The solid white lines show the areas where when not turning a row in the Nobuko of the letter I could do a small turn around stitch or tacking stitch. I tried not to end threads in these areas unless I was sure there was going to be padding. The area by the cat’s tail (upper left) was an area where I first used a traveling stitch, but the other areas by the moon, fence and pumpkin were either padded or I could do a tacking stitch that would be stitched over later.

Letter I: The hat is ultra-suede so I could turn rows in this areas and I had stitched most of the top right half of the letter, leaving only the center of the flower unstitched. And the bottom was a pumpkin that was to be padded so I had turn around areas here too.

Letter C: This was one of the two easiest letters to stitch; it was all Nobuko and the spider web and spider were couched and stitched over. This made turn around/tack stitches easy for the background. Hardest part was the inside of the C background. I first stitched from center toward K until I had a full line, then went back and filled in the center of the C.

Letter K: The K didn’t present much of a problem stitching the background as the Nobuko is at the top and bottom of the letter, the pumpkin is padded and the bird body is a Cashmere variation that allows for turn-around stitches. The little bit of orange background in the center right of the K took a bit of maneuvering as not much stitch was on the top of the canvas.

Letter E: Since all the steam was stitched first in Nobuko and the pot was an applique, there were plenty of turn-around places for the background. I thought about repainting the mistake in the background but though I could cover with the thread and the steam, so I left it. I see it but I think the canvas has enough stitching interest to keep most people’s eye moving past it.  I waited to do the yellow background until after I had stitched the orange between the E & D.

Letter D: Nobuko is pretty straight forward here again. The instructions say the large bats are stitched in diagonal Gobelins and smaller bats are Basketweave. So the top right bat was the only one I felt I needed to drop down below to make a turnaround stitch in Nobuko; the larger bats I could take a small tack stitch in the wing areas. The biggest problem was lining up the yellow background inside the D.

There are only three places where you have a top to bottom vertical line to keep the pattern established: to the left of the E in yellow background; the center line of the orange area, and the far right of the D. So you have to stitch background yellow center to the left and establish line on the E and center to the right to establish vertical line on the right of the D. The orange is the center line.

Once the background and letters were in the fun began and again I started with the W and worked to the D. Here was where I made a few more “sudu” changes. Remember, needlepoint has to be fun or don’t do it. I will usually try a new technique, stitch or thread but if it becomes frustrating to me or I don’t like it, I stop and take it out and find something that works for me.

Next time I’ll tell you about the design elements of each letter. If you have any questions, just ask in the comment area and I will try and answer them.

Thank you for stopping by, I hope you have time to stitch today.

ttfn…sue

Melisssa Shirley “Wicked”

Promised we would add some needlepoint in here…and then I got behind last week and of course the blog is the first to go. I really wish I could write ahead and have several posts ready to go. I’ve just never been very good at that; maybe I’ll try again.

Most of my stitching is either a geometric counted pieces or I am designing my own original pieces so a painted canvas with a stitch guide is a rarity for me until this past year. This past year I have done at least three or four with stitch guides and several even had thread kits. BUT not one of them is stitched exactly like the stitch guide was written; sometimes I wasn’t happy with the chosen thread and other times I chose a different stitch. But I did read every stitch guide before I started stitching and if there was a thread or stitch I was unfamiliar with I either tried it on the edge of the canvas or on a doodle canvas I keep handy.

I go in spurts doing painted canvases and most of the painted canvases I have stitched never had a stitch guide so I was on my own. Stitch guides are a relatively new thing on the needlepoint market, they have become a big thing in the last several years. I have mixed feelings about stitch guides. I think they are great as a guide, but please remember these stitch guides are not written in stone. If you don’t like a certain thread or stitch, then don’t make yourself miserable trying to use it or stitch it…change it. Needlepoint is supposed to be fun and THERE ARE NO NEEDLEPOINT POLICE (unless you enter a piece to be judged and then that’s a different story.) So be sure if you are buying a canvas with stitch guide and threads, be sure and look over the stitch guide first for threads you might want to substitute before purchasing all the threads. When you get home read the stitch guide and if there is a stitch you just fight all the time, then start to think of what you might stitch in its place.

So if possible, you might wait to purchase the threads for the canvas later. Live with the canvas a while, read the stitch guide and check you stash for threads or threads you can easily substitute…i.e. Neon Rays for Ribbon Floss, one brand of silk for another (be sure to adjust ply and make sure color is very, very close. ) Also if there is a thread you do not enjoy stitching with, you probably have already thought of and used a substitute thread, so just see if it comes in the color you need for this project. You can also use partial skeins sometimes if the area you are stitching doesn’t call for multiple cards or skeins.

I always try and remember to take pictures of unstitched canvas before I start stitching; but sometimes I forget and I only remember when I get to a place where I want to cover the painted canvas and stitch later…but I usually get a picture before I stitch too much stitching is completed. I take pictures of my unpainted canvas one of two ways and sometimes both: The difference, you ask?

I use the copy machine, especially if there is an area I am going to use felt padding or need a pattern to make an applique. I use the copy machine when I want an exact copy of the design ..or almost exact copy.  Copy machines do reduce your image about 1-2%, but it is usually not negligible, and a copy machine picture is much better than trying to get a photo to resize to the correct size.

I use my phone or PHD (push here dummy) camera if I just need a picture to take notes about the canvas. I use this method when there is not a stitch guide and I want to make notes about the threads and stitches I use. With my camera image I can reduce or enlarge areas to suit my needs, but I still find the copy machine best if you are making a pattern of an area.

After I have an image(s) of the canvas I read the stitch guide. You bought a stitch guide, it is written, and you might as well read it. I also keep the canvas handy so I can refer to the areas as I read. I sometimes make notes on the image I have printed if I may want to change something or if there is something I want to look at or do before I stitch an area.

So let’s talk about one project I did last year, Wicked. This is a Melissa Shirley canvas (http://melissashirleydesigns.com/galsearch/index.cgi?index=1382044750_26409&col=)

OLYMPUS DIGITAL CAMERA

and I had a stitch guide and threads. I will tell you I did not always follow the stitch guide and there were a couple threads I did not use. The stitch guide was a guide for me and a few places I did change or modify instructions. Wicked was a gift to me and it came with canvas, stitch guide, threads and embellishments, so I just checked my stash to use up any partial threads I might have and I did substitute two thread choices, but I didn’t do it until I was stitching the area and the suggested thread was just not working for me.

OLYMPUS DIGITAL CAMERA

I made notes on pages I had printed out for each letter as I read the stitch guide and then as I stitched each letter I also made notes on these same sheets.  My first change was to stitch the letters in Nobuko instead of Basketweave. I just wasn’t in a Basketweave mood and I really thought Basketweave would cause the letters to recede and I wanted them to be on top of the background. And by stitching them first, it gave me a place to turn rows of the darning background around with less difficulty and also to begin and end threads if I couldn’t get to an edge.


OLYMPUS DIGITAL CAMERAI was happy to read that I was suppose to stitch the background as one of the first elements of the project; backgrounds can be long and boring, especially after you stitch all the fun stuff. I decided to center the background darning pattern in each section; you can see my centering marks on the canvas. I also tried to begin and end threads for the background at the edges of the canvas using an “L” or “U” stitch. I could also begin and end threads in the letters where I stitched Nobuko. I used the Nobuko also to turn a row and keep background darning pattern thread in line.  Sometimes where I knew I would be padding the canvas with felt or thread I could also make a turning stitch, but I tried to keep this to a minimum. Sometimes I had to do a small tuck stitch or carry the thread up further than2017-05-01 beg & end I might have liked.

It seemed like it took me forever to get the background and letters stitched and I do think it took me about a month. But them each letter was fun to embellish and I worked them from W to D.  I’ll tell you the few things I waited until the very last to do as I tell you about the letters. I did not stitch the details of each letter until I had the letters and background complete, but I didn’t take pictures either so you’ll have to bear with me on this one.

And this is about all I can write today…I think I am well over my 55 minute sitting time.

So I will get up and walk and maybe I can get back to this and be a few posts ahead.

Thank you for stopping by, I hope you have time to stitch today.

ttfn…sue

Pi Day

We are going to a wedding reception this afternoon and were asked to bring our favorite pie…I really didn’t think anything of it  (the host is a great pie lover) until this week and the news media started taking about Pi Day. Then it hit me…they are just waiting to see who bites (pardon the pun).

In case you don’t know, today is Pi Day.

What is Pi Day you ask?

Saturday, March 14 is a very special Pi Day that comes but once in a century. That’s right, it’s 3-14-15, the only time before 2115 that the date reflects five digits of the magical, infinite number, 3.141592653…from the Washington Post

15 used instructionsSo I had to make a pi/pie. Only kind that I knew would be successful was the kind I stitch. So I charted one and stitched it. I have included the chart and finishing instructions as a PDF in case anyone else wants to do one. Pi day is every year; this year just is special because it is 3-14-15

15-03-14 Pi ornament aBUT my little creative mind did not stop here… We had  bought the lucky couple a pie plate and were going to give them cash (not very creative but wait…last night I had this great inspiration…we are going to get $1 and 2 bills to line the pie plate (representing 3). and then fill with 14 dimes and nickels (representing.1415) and cover with cling wrap.  Our pi pie.

Well I must be more of a nerd than I though but this just appealled to me.


15-0314 Pi ornament bAnd my real pie…coming from the store of course!

If you have trouble downloading the Pi instructions just email me and I will send you the PDF version. I may not get to it until later today or tomorrow as I am on my way to a St. Patrick’s Parade and then I am going to the wedding reception.


BTW here are some pretty cool places to visit today …all about PI:

http://www.usatoday.com/story/news/nation-now/2015/03/14/pi-day-kids-videos/24753169/

http://www.washingtonpost.com/blogs/wonkblog/wp/2015/03/14/10-stunning-images-show-the-beauty-hidden-in-pi/

Thank you for stopping by to visit, I hope you find time to stitch today or do whatever helps you be creative!

ttfn…sue

PS if you hold up 3.14 (have to have pointed 4) it is this: 🙂

15-03-14 pie reverse

Happy Valentine’s Day

One day inspiration struck and I stitched part of a design to see if it would work and so I had this partially completed canvas lying around. I also have a drawer(s) full of buttons, pins, and tchotchkes (trinkets) waiting to find a canvas. So combine one button from LaMode with a partially finished canvas and you have a 2 1/2 scissor fob, small ormament, whatever.

So one day I put it in the computer and today I’m giving to anyone who would like to have it.

One trinket+ one small canvas + stash threads+ 2 hours + finishing = one cute gift.

OLYMPUS DIGITAL CAMERA


15-02-14 I Love Squares layoutHappy Valentine’s Day. Hope it is a sweet one.

Thank you for stopping by to visit, I hope you find time to stitch today or do whatever helps you be creative! ttfn…sue

P.S. If you need me to email you a PDF version just let me know…happy to do it.

Stich’n & Comput’n

For the past two weeks I have been frantically using my fingers to either stitch or write stitch guides; the tips of my fingers are screaming, “What is going on?”

It all started two weeks ago when I remembered I had a 1st Communion coming up for one of my Grandsons and I better get his gift because I wasn’t the only Grandmother looking for a gift.  I get these ideas in my head and then when I can’t find what I want I get frustrated; and that’s just what happened to me while I was shopping. I had decided to get him a statue of his name saint and couldn’t find one I liked. So I am now aimlessly walking around the store looking for something I do like. Finally decided to look for a card and that’s when inspiration struck.

14-05-08Comm pictI found four cards and one I decided would make a great needlepoint design and sure I could design and stitch it in a week. (My Guardian Angle must have been taking a short nap because it didn’t jump in to say, “REALLY????”…I am such an optimist sometimes. So I purchased 4 cards and a few other little things (the trip wasn’t a complete bust) and came home. Good thing my DH was driving because all the way home I was thinking about the design. And I could tell by the look on DH’s face, he thought I had lost my mind…I think if I had thought about it I would have too; but I had seen the cross immediately…so how hard could this be? By now my Guardian Angel was awake but so taken back she couldn’t so anything but keep those negative thoughts out of my head.

Once home I got out my trusty computer and scanned a copy of the card into the computer. I knew I wanted the design to be about 4 inches square. I had already decided that if I couldn’t find a frame to suit me I would make a stand up or an ornament; so I wanted the size to be smallish. 4 inches give or take would be a good size, that was 72 threads, give or take, on 18 count canvas..

First I did the lettering: Name, Church, date, 1st Communion. I have two go to alphabet books:

1. Rose Ann Hobbs; Designed Alphabets Book 1 (I have Book 1 and 2 and would love to find 2 and others she wrote)

2. B. Borssuck; 97 Needlepoint Alphabets

14-05-08Comm Step1 borderI used two alphabets: 9 high for upper case and 5 high for lower case. I played with the placement and once I got the lettering into place I knew how much design area I had to work with and if I was going to be able to fit the design inside lettering.

I had seen the stitches for the cross the minute I 14-05-08 Comm Step2 crosslooked at the card, it was just one of those fall into place moments (trust me this doesn’t happen often). So the next step was to see if the cross would fit and still leave room for the designs. So I plotted the cross.

Once the cross was in place I placed small pictures of the motifs in the spaces and started plotting stitches I 14-05-08Comm Step3 motifsthought I would use. This all came rather quickly and I did not second guess myself. My Guardian Angel was working overtime just keeping me on track; she already knew this design was divine inspiration and her job was to keep all negativity away from my thoughts.

Next step was to pull threads and I pulled way too many overdyes but I stepped OLYMPUS DIGITAL CAMERAback and pulled some go to DMC cotton solids too. I needed a Kreinik gold metallic that I had in various sizes. There was not time for a trip to needlepoint shop…and anyway we
only have one with a large variety of threads and it is OLYMPUS DIGITAL CAMERAby appointment. I could have called the owner and if she had what I needed she would have opened for me but I was already pushing the envelope and tried to find threads in my stash.  My thinking on the threads was I wanted to use threads that would wear well with young children…remember at this stage this design still had possibilities of becoming an ornament.

With threads pulled, canvas on stretcher bars, I sequestered myself in my stitching nest and started. Found in my haste I had made a couple spacing errors in the lettering but nothing that was going to throw the design out of line.  After the border was stitched I found the center of the remaining area and began the cross. The cross is my favorite part, I saw it from the minute I picked up the card and now it was stitching up just like I saw it.

OLYMPUS DIGITAL CAMERAOnce I got to the motifs…I had more inspiration. Why not try needleweaving for the challis…if it worked then I would needleweave the basket for the hosts too. My Guardian Angel by now was wide awake and pulling her hair out, how much could she do to keep this design on track? The challis worked out just fine and so I started the wheat. The wheat was stitched like the designed had planned but just wasn’t looking good but it would have to do for the moment. The hosts and basket were next and they too stitched up just as I hoped. The grapes I had seen as beads but at the last minute decided French Knots would be a better choice. Okay all the motifs are completed but the wheat has to be redone. It just looked awful and needed help. So I cut it out and went with a heavier thread and straight stitches instead of Lazy Daisy stitches. It looks much better and it is done..

All I can tell you is that it was divine inspiration and my guardian Angel was working overtime to keep me from second guessing myself…and to keep my fingers moving with needle and thread. I wish all my designing came this easy…

I found a frame and I have put the piece together and last Sunday one of my Grandsons received his own personal 1st Communion gift, a true gift from God. I blurred his name because I have a thing about kids names on the internet…especially little kids. Thank you God for this special project!

2014-05-08 GradThen in a misguided state of “You can do anything”, I decided to make a graduation needlepoint for his sister who is graduating from 8th grade this year. Border of course was easy…trusty alphabets. But that shamrock gave me a run for my needle. I had plotted it on the computer but for some reason was having more trouble with this design than the other; probably because I was second guessing myself. Then of course I did not have the right green ribbon for the cross, and none was to be found in town (I called) so I had to make an executive decision and I think I chose right. I had a multi green but I think it had too much blue; I like the gold better for the cross. But I persevered and this is her gift she will receive for graduation next week.

2014-05-08  Stitch guideAnd in-be-tween all this stitching I was writing stitch guides for pilot classes and the stitch guide for the 1st communion piece. And since I know this 1st Communion design was a gift from God (I on my own do not work this fast)…I want to share the design with everyone. If you email me: sudu@kc.rr.com, send me your email and I will happily send you a PDF of the design. I just ask that if you stitch the design you send me a picture.

All I can say is if the rest of my body worked out as much as my fingers have these past two weeks, I’d be in great shape. This week’s pace is a bit slower I have another pilot class to compute and always have something to stitch, but my fingers are not moving so fast.

Thank you for stopping by this week and I hope you have time to stitch every day in May! ttfn…sue

Sidetracked…A present & Value of Gray study

I am still stitching on the flowers for Mom & Me. Hope to have it finished this week-end.

But this week I got a bit sidetracked.

OLYMPUS DIGITAL CAMERA
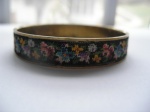
My DH brought this find to me this week. He found it in the basement; I think it must have been in the tools and craft drawers from my uncle.  It must have been a pin at one time but the pin-back is missing. I also have a bracelet similar to this that my uncle gave me several years ago. And I also have 2-3 thimbles with this petit OLYMPUS DIGITAL CAMERApoint. I tried researching these but the best I could find is that they were made in the 1940-50 in West Germany or Austria. None of mine has a marking that I can see but all are backed in brass. Doesn’t matter, I like them and just wish I knew more about them. OLYMPUS DIGITAL CAMERAAnyone out there who knows about this jewelry I would love to hear from you. Hummmmm, do I feel another collection blooming?

And I worked more on my Values of Gray study. I have all the written work completed; I have begun to make computer pages of my samples and I have my paint samples made. I haven’t decided if I am just going to market the book with designs or whether to teach it online and share my samples too.

All my stitched samples are completed (well except for the big project I want to do) and I have had this idea in my head ever since I saw Kurdy Biggs sewing wallet (http://www.threedles.com/06012011/2013/Pangea/Pangea_BagAndWallet.html)….I loved it! And while I was stitching the samples for Shades of Gray I decided to make my own sewing book (but that isn’t the big project).

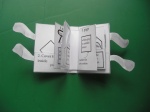
OLYMPUS DIGITAL CAMERASo I have been mulling around my ideas…the other night at 2 AM an idea came to me.  Just as a thought…does everyone get these spurts of inspiration at odd hours or is it just me? These creative outbursts really cut into my sleep and I had to get up to draw a rough OLYMPUS DIGITAL CAMERAsketch of the ideas. Next morning I drew them on the computer and then made up this small paper mock up. Now I am measuring needlework and thinking about how to construct the book. Any suggestions for sources of books or online helps would be appreciated. I have already decided to make a muslin prototype and think I’ll start this soon.

Today is opening day for the KC Royals so I see baseball and stitching in my afternoon plan.

Thank you for stopping by this week and I hope you have time to stitch every day! ttfn…sue